File Into Formal Complaint
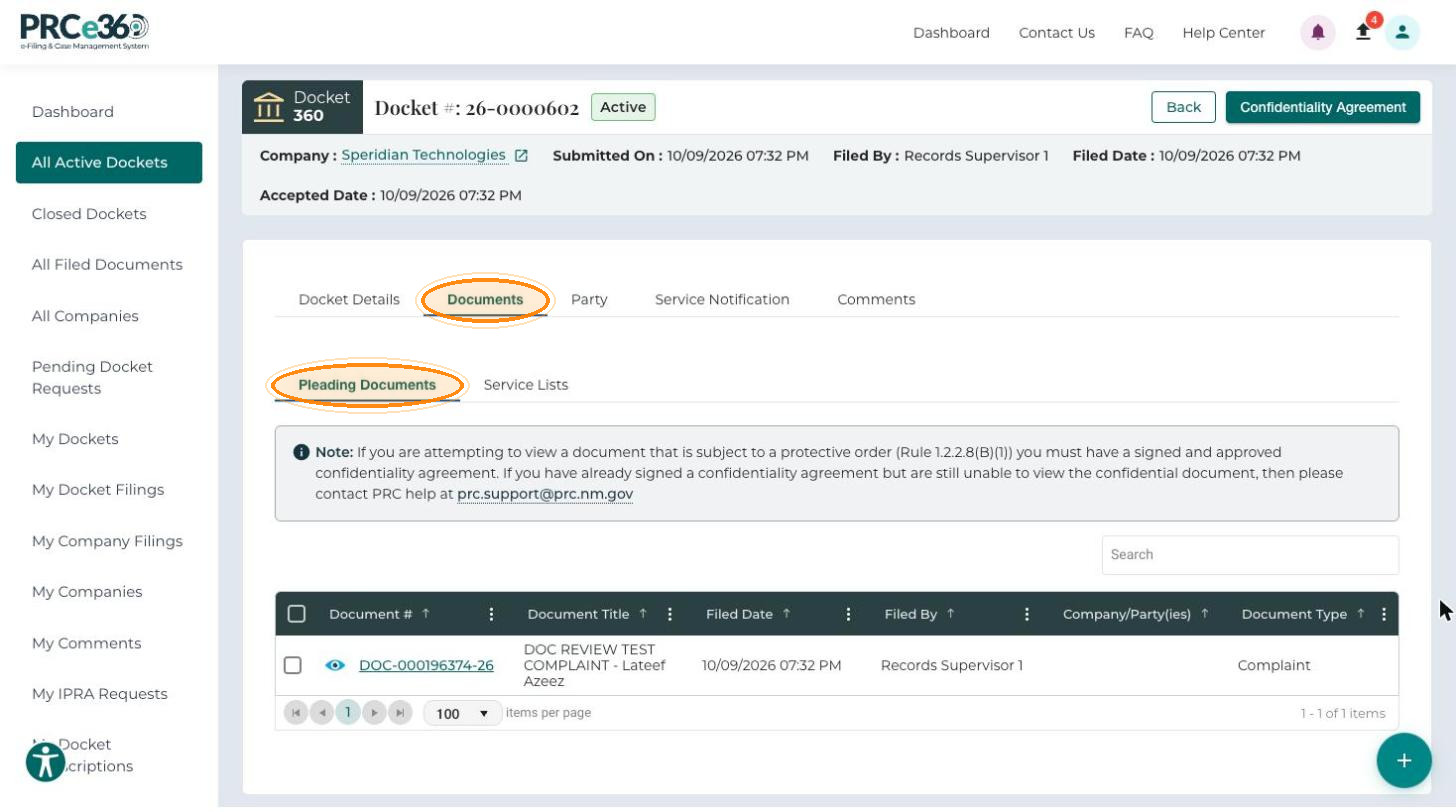
Upload additional documents or evidence into an existing Formal Complaint docket. NMPRC staff review each filing, and accepted filings appear under the docket's Pleading Documents tab.
Tier 1 and Tier 2 users, through Add to My Formal Complaint in the Submit New menu on the dashboard.
- Know the docket number of the formal complaint you are filing into.
- Have the documents to upload ready. At least one document is required.
Open the Form
-
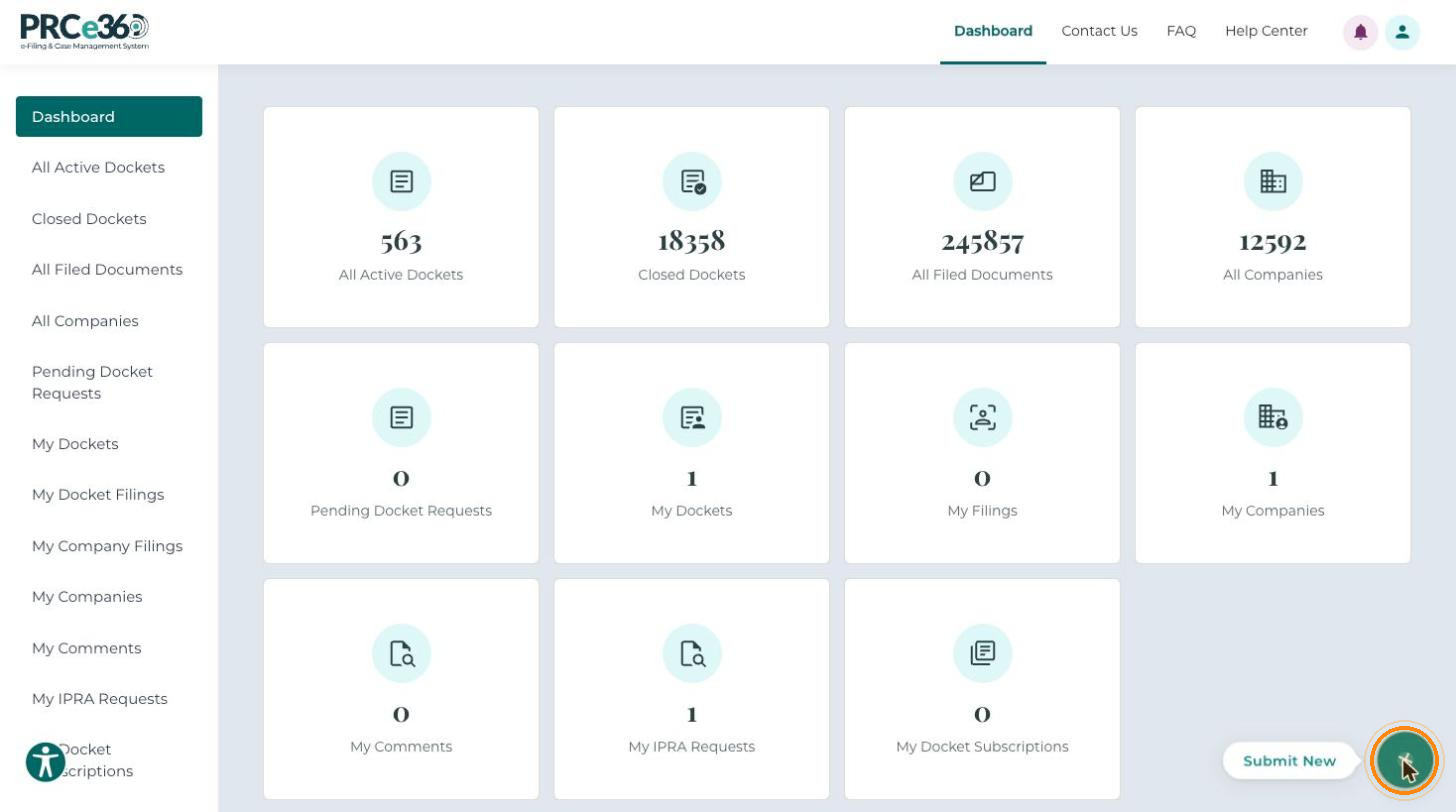
Log in and go to the Dashboard.
-
Click Submit New (the + button at the bottom right).
-
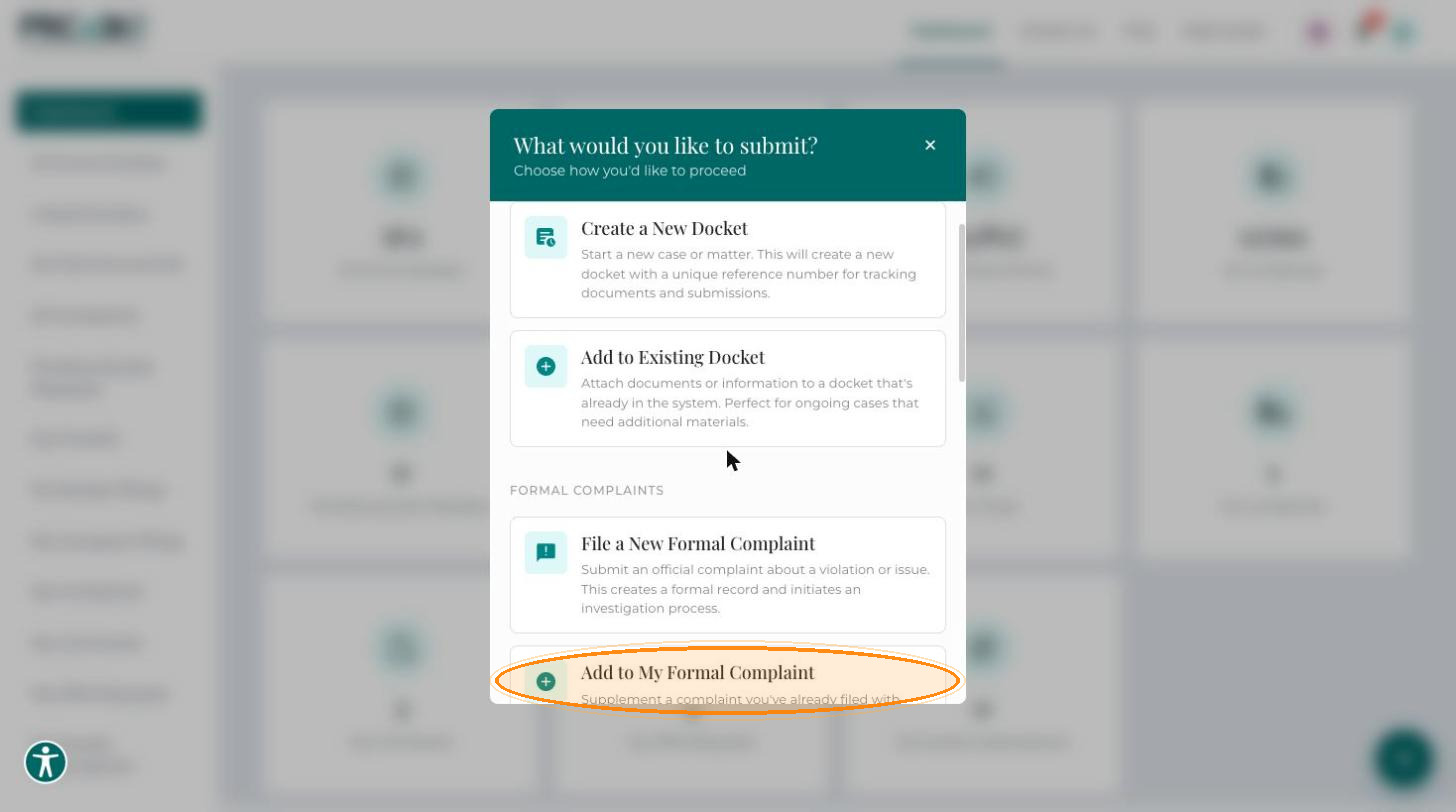
The What would you like to submit? window lists the filing options. Under Formal Complaints, click Add to My Formal Complaint.
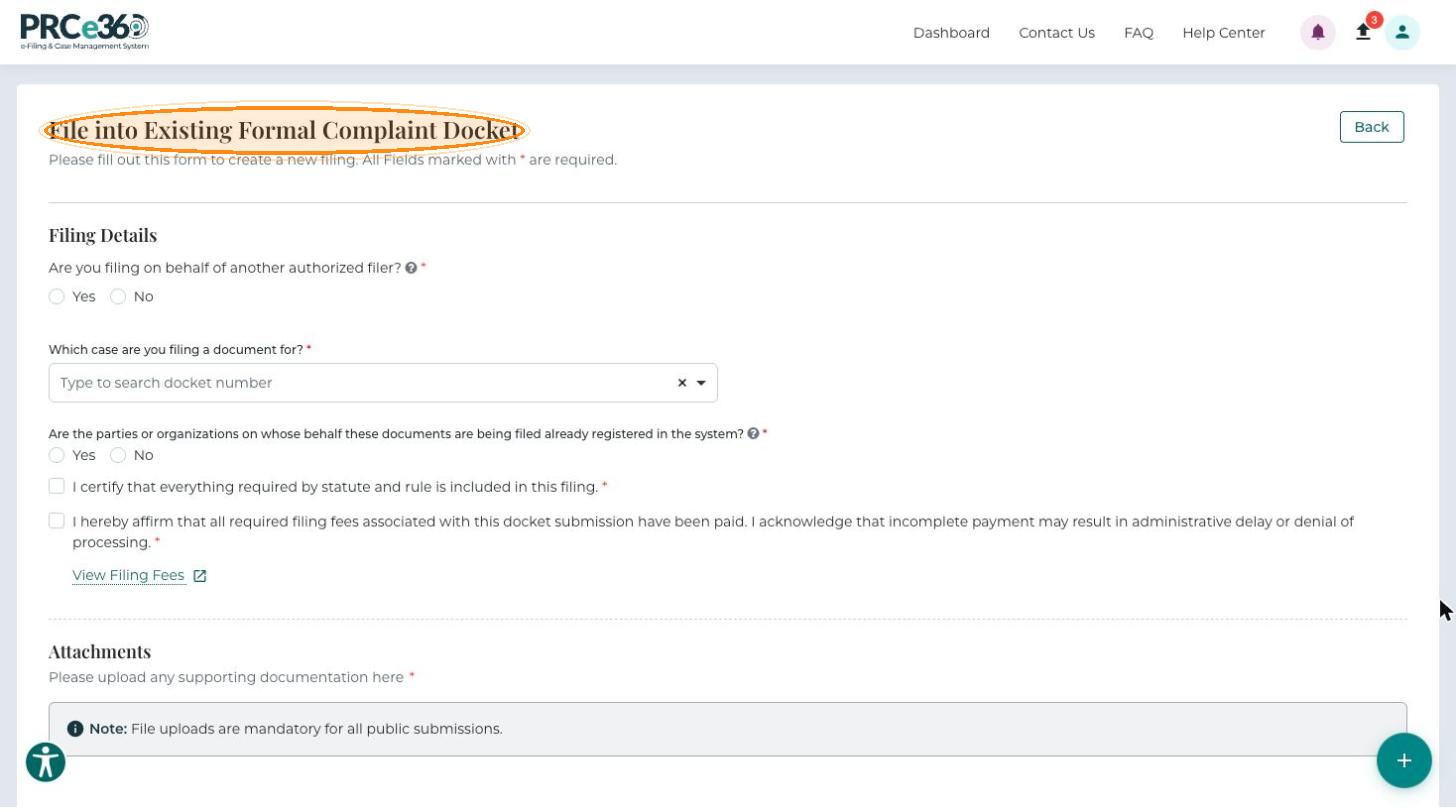
The File into Existing Formal Complaint Docket form opens. All fields marked with * are required.
Filing Details
Filer
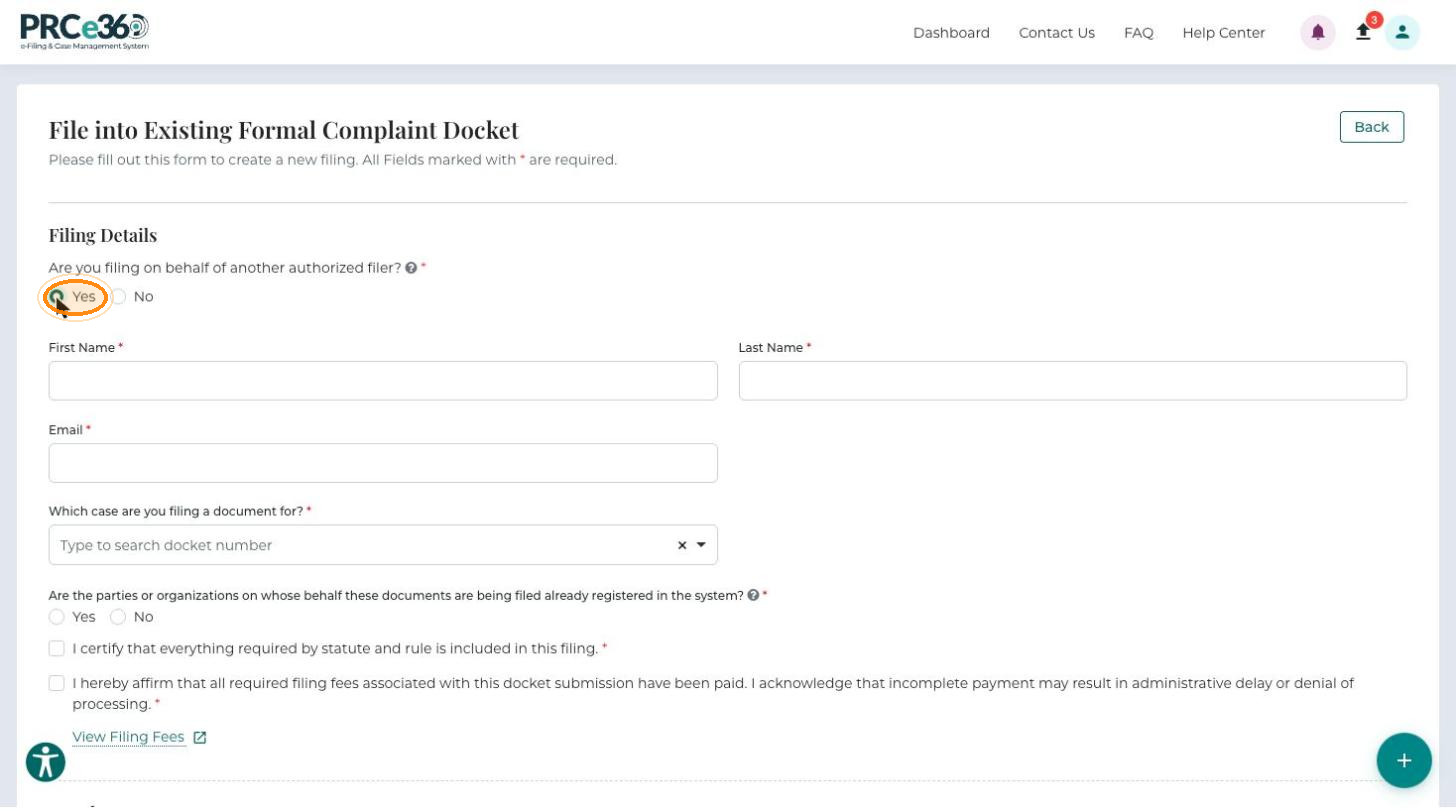
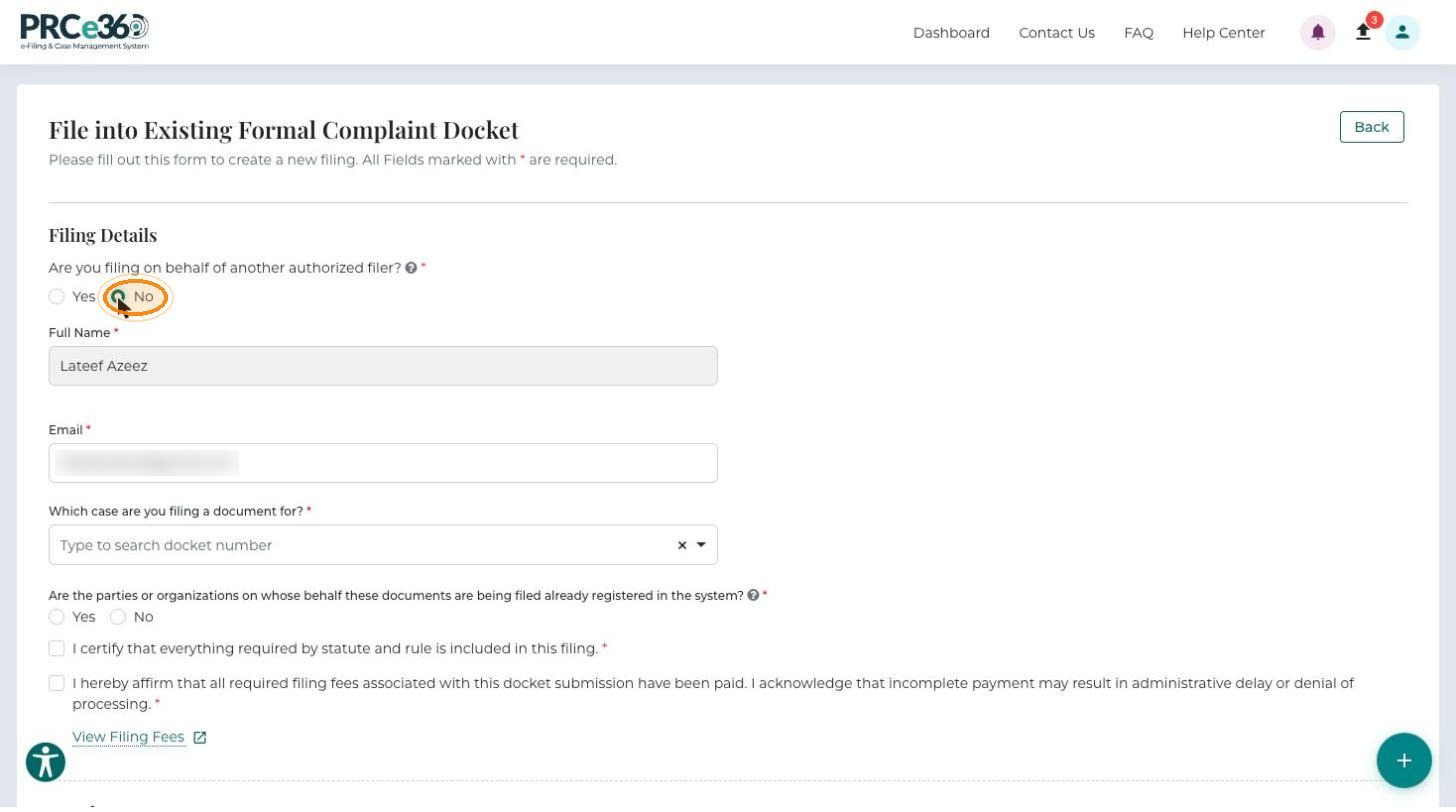
Answer Are you filing on behalf of another authorized filer?
-
Yes – enter the filer's First Name, Last Name and Email.
-
No – your Full Name and Email fill in automatically.
Formal Complaint Docket
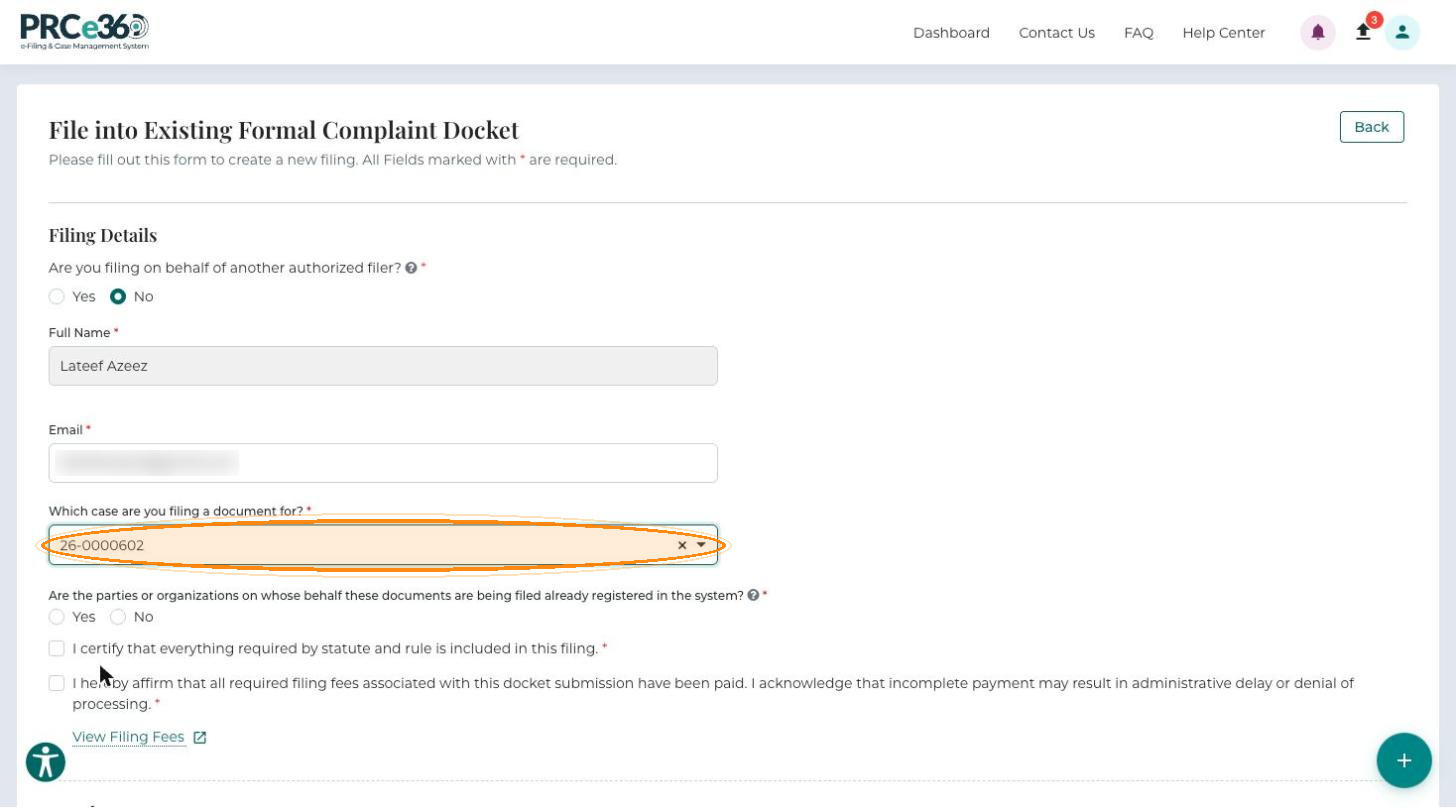
In Which case are you filing a document for?, type the formal complaint docket number and select it from the list.
Parties
-
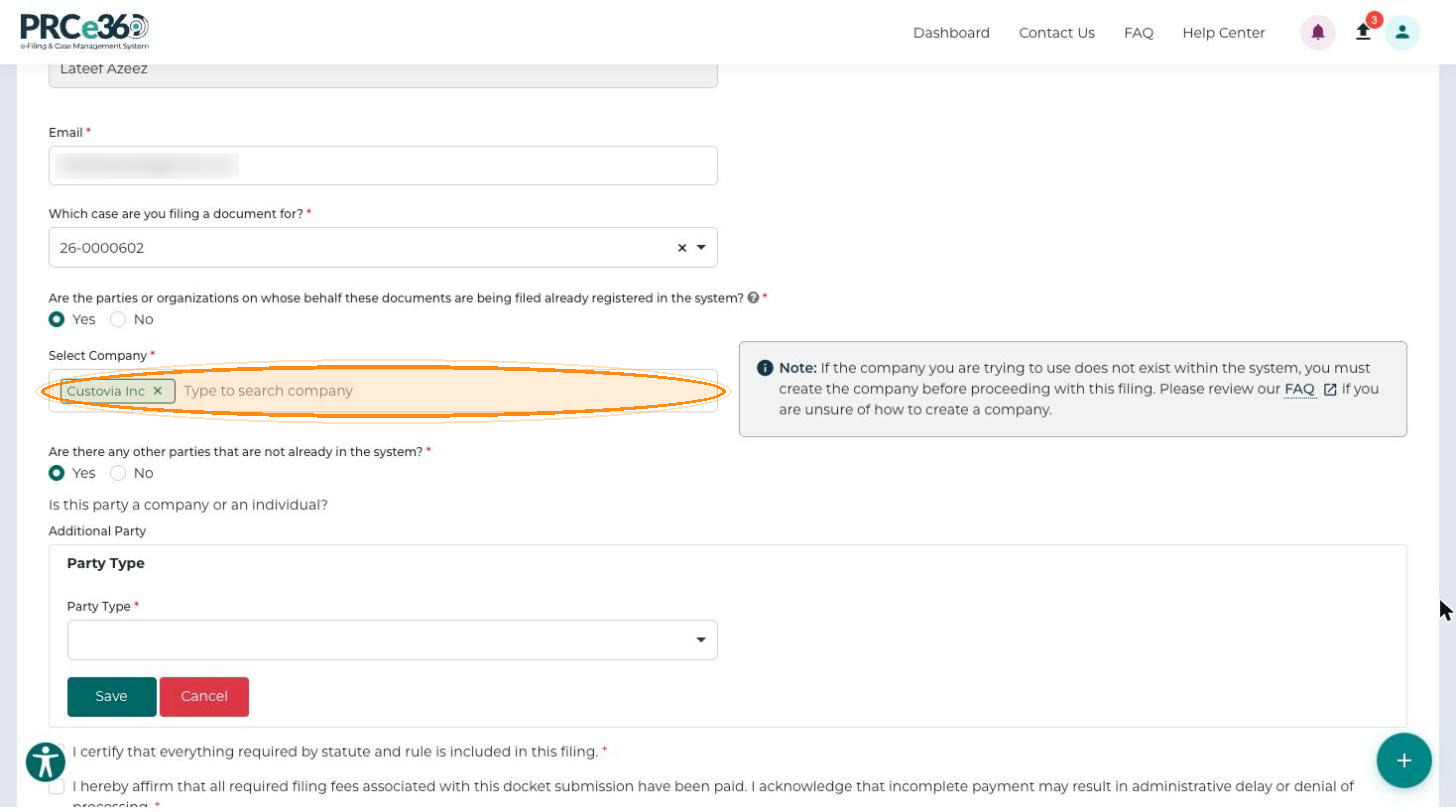
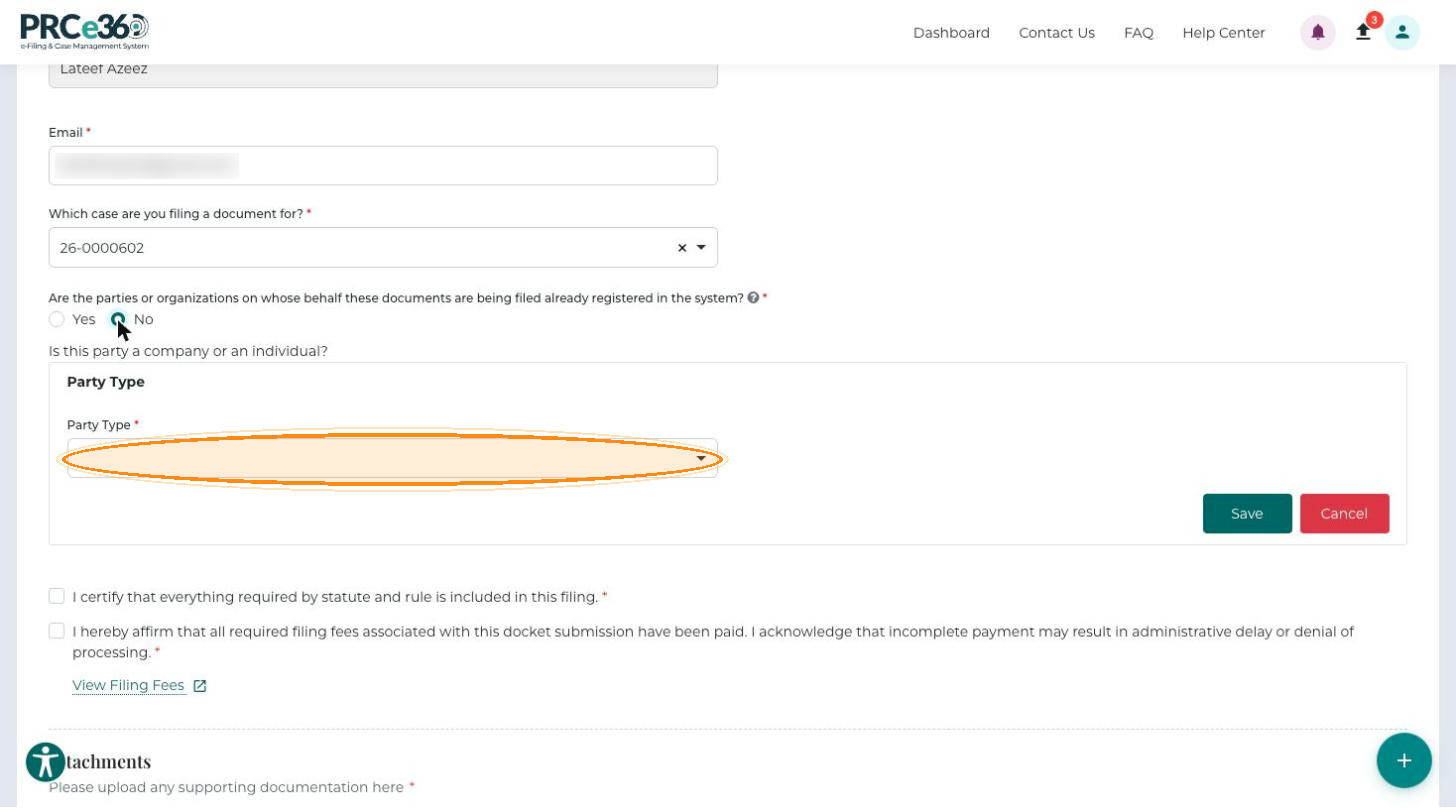
Answer Are the parties or organizations on whose behalf these documents are being filed already registered in the system?
-
Yes – in Select Company, search for and select the company. If the company does not exist in the system, it must be created first; the note next to the field links to the FAQ.
-
No – enter the party details manually. Under Is this party a company or an individual?, choose the Party Type (Company or Individual), enter the required information and click Save.
-
-
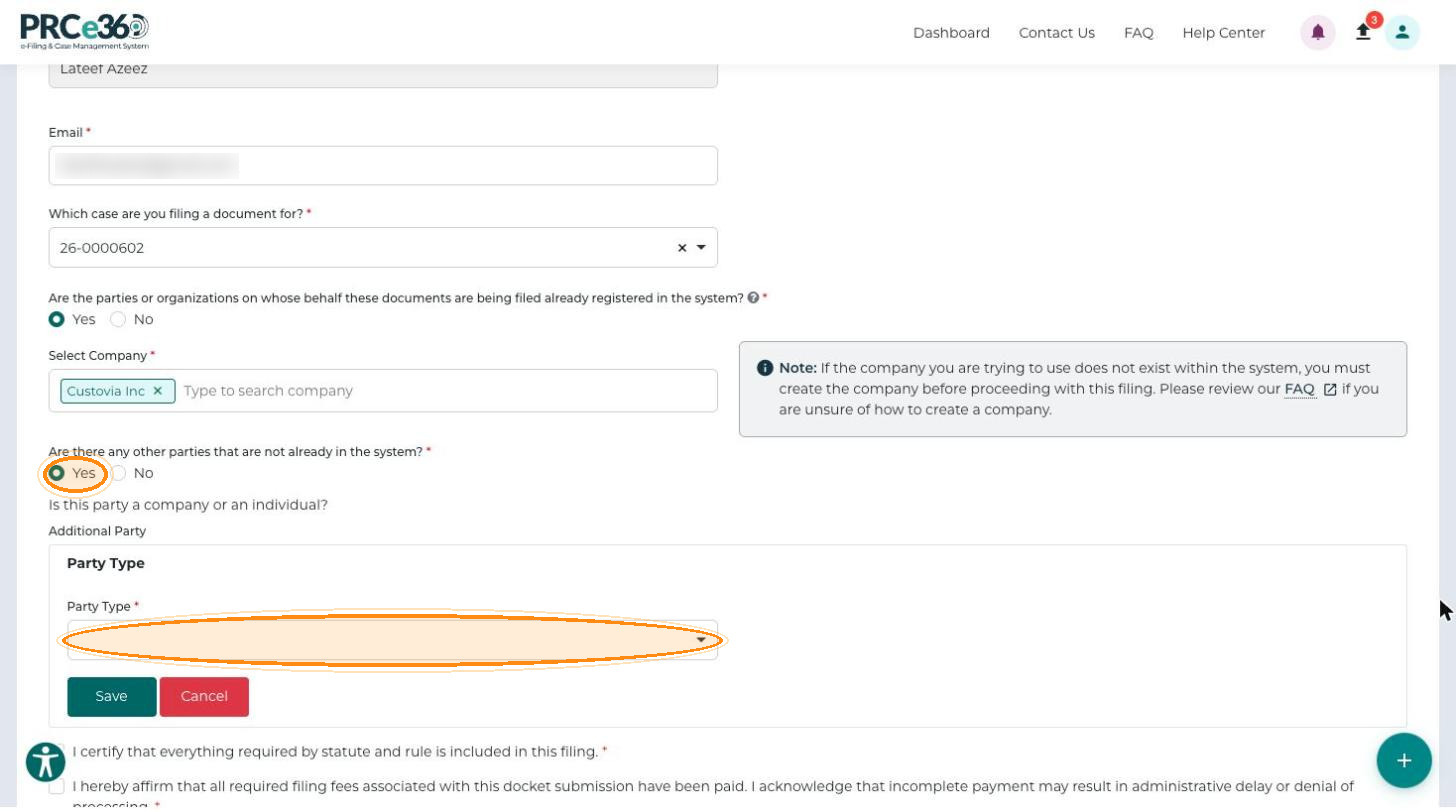
To add parties that are not in the system, answer Yes to Are there any other parties that are not already in the system? In the Additional Party panel, choose the Party Type (Company or Individual), enter all required information and click Save to add the record to the grid. Repeat for each additional party.
-
Use the Edit or Delete icons in the grid to change or remove a party.
Certification
-
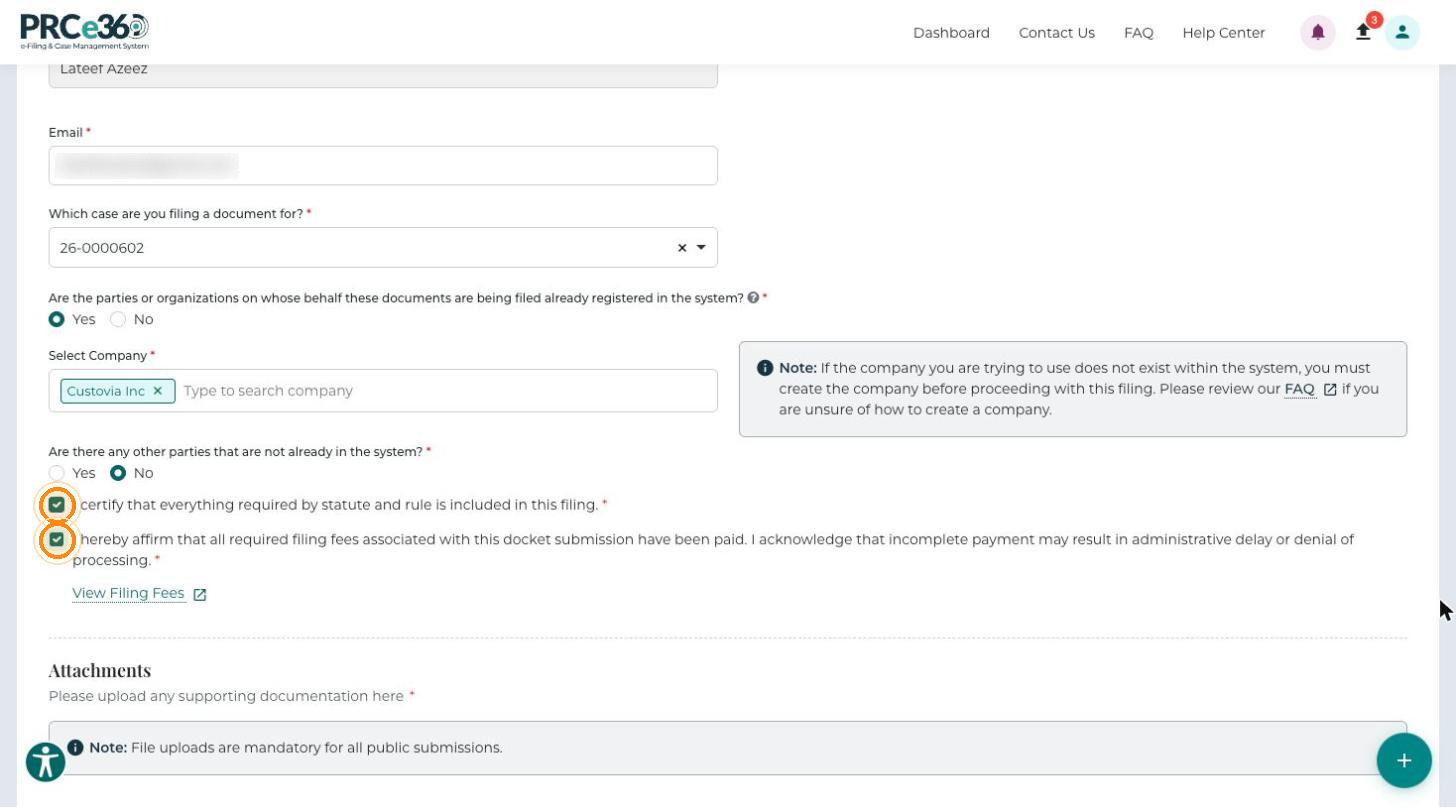
Select I certify that everything required by statute and rule is included in this filing.
-
Select I hereby affirm that all required filing fees associated with this docket submission have been paid. I acknowledge that incomplete payment may result in administrative delay or denial of processing. Click View Filing Fees to see the fees.
Upload Documents
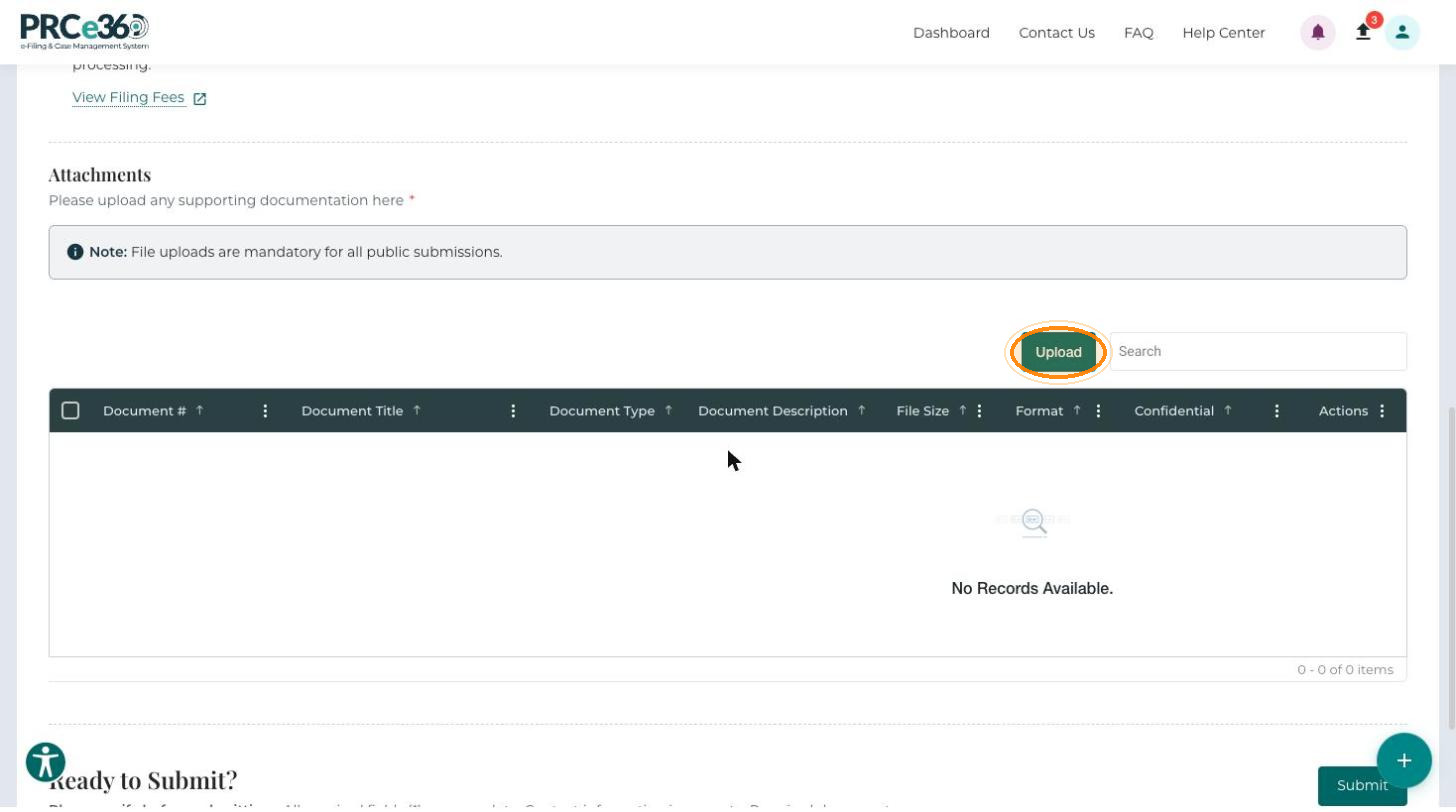
File uploads are mandatory for all public submissions.
-
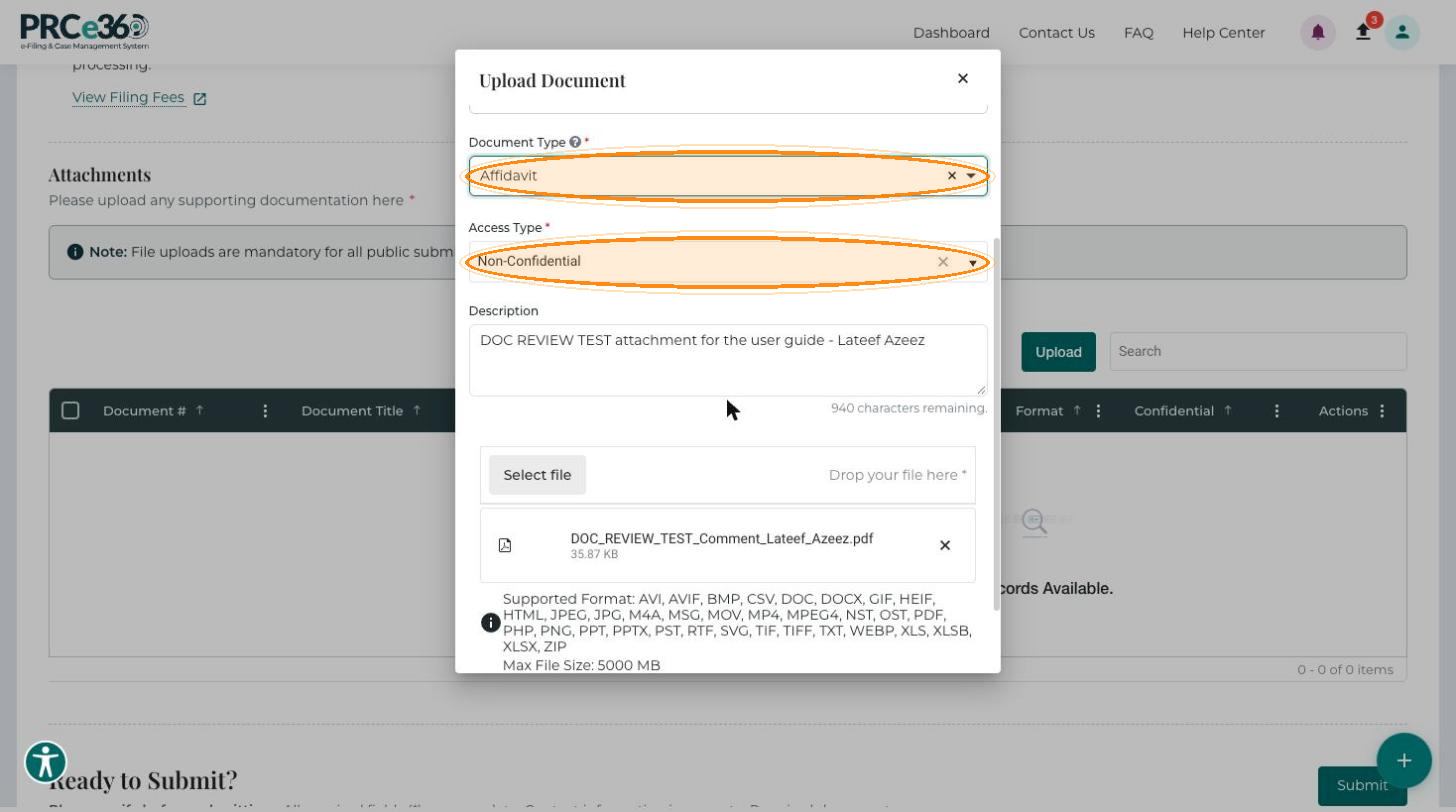
In the Attachments section, click Upload. The Upload Document window opens.
-
Enter a descriptive Document Title.
-
Select the Document Type, for example Petition, Exhibit or Order.
-
Choose the Access Type: Non-Confidential (the default) or Confidential.
-
Optionally, enter a Description that summarizes the contents.
-
Click Select file to browse, or drag the file onto Drop your file here.
-
Click Save to upload.
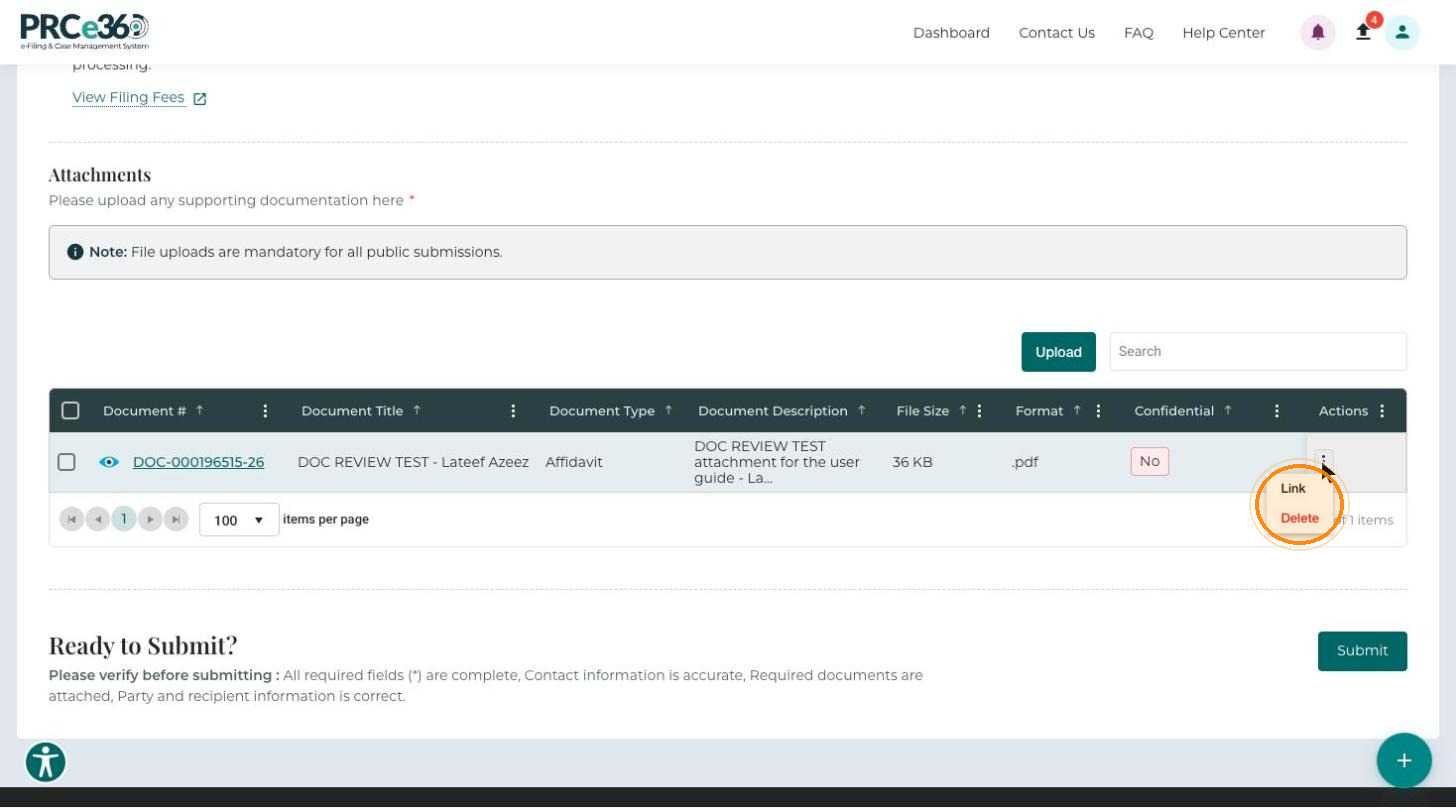
If you upload documents that support your main document or pleading (testimony, affidavits and so on), link them to the main document. Failure to do so may result in rejection of your filing.
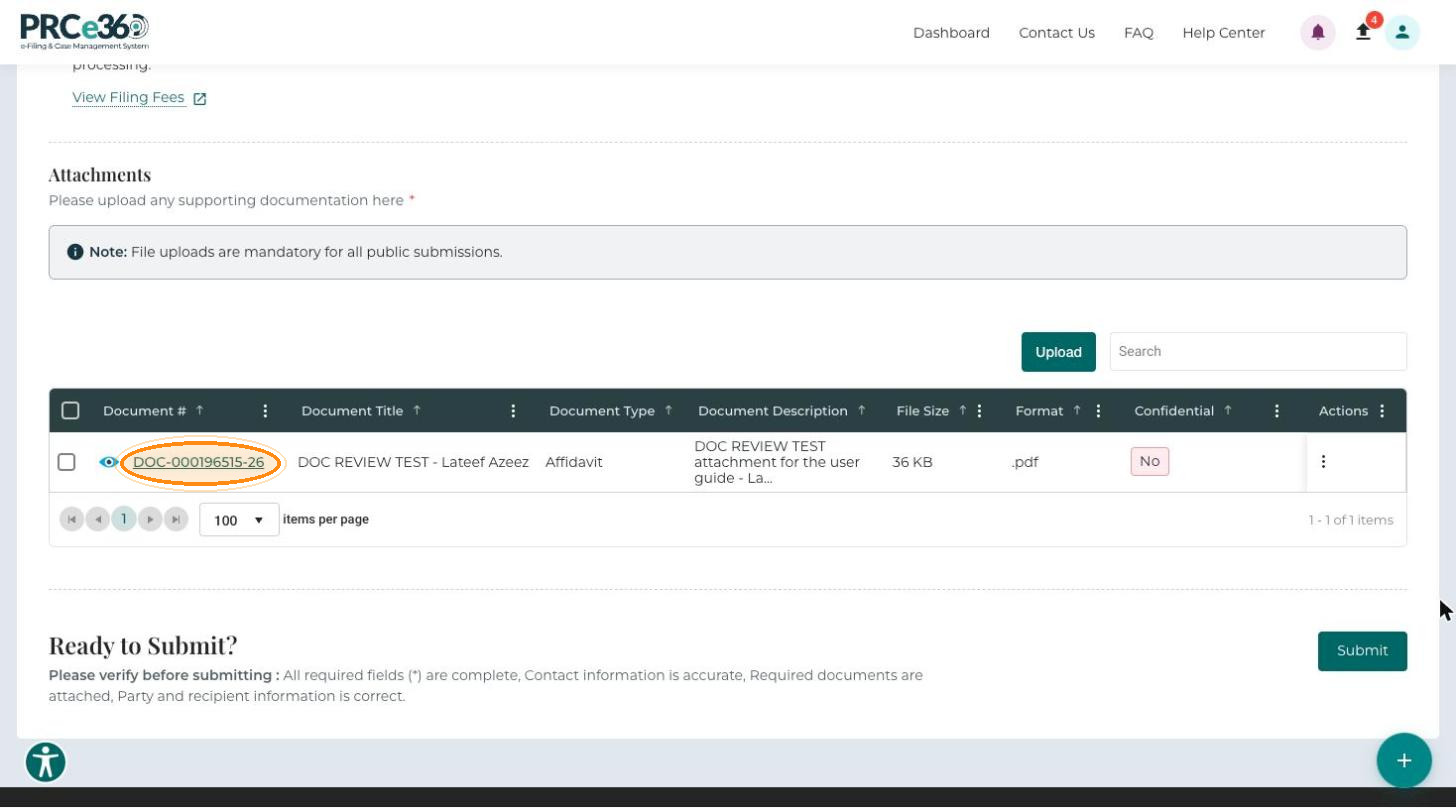
Uploaded documents appear in the grid.
| Column | Description |
|---|---|
| Document # | System-generated unique identifier for the file. Click the eye icon to view it. |
| Document Title | Title you entered. |
| Document Type | Category of the document. |
| Document Description | Short explanation of the contents. |
| File Size | Size of the file. |
| Format | File format, for example .pdf. |
| Confidential | Whether the document is marked confidential. |
| Actions | Link the document to a related document, or Delete it. |
Submit the Filing
-
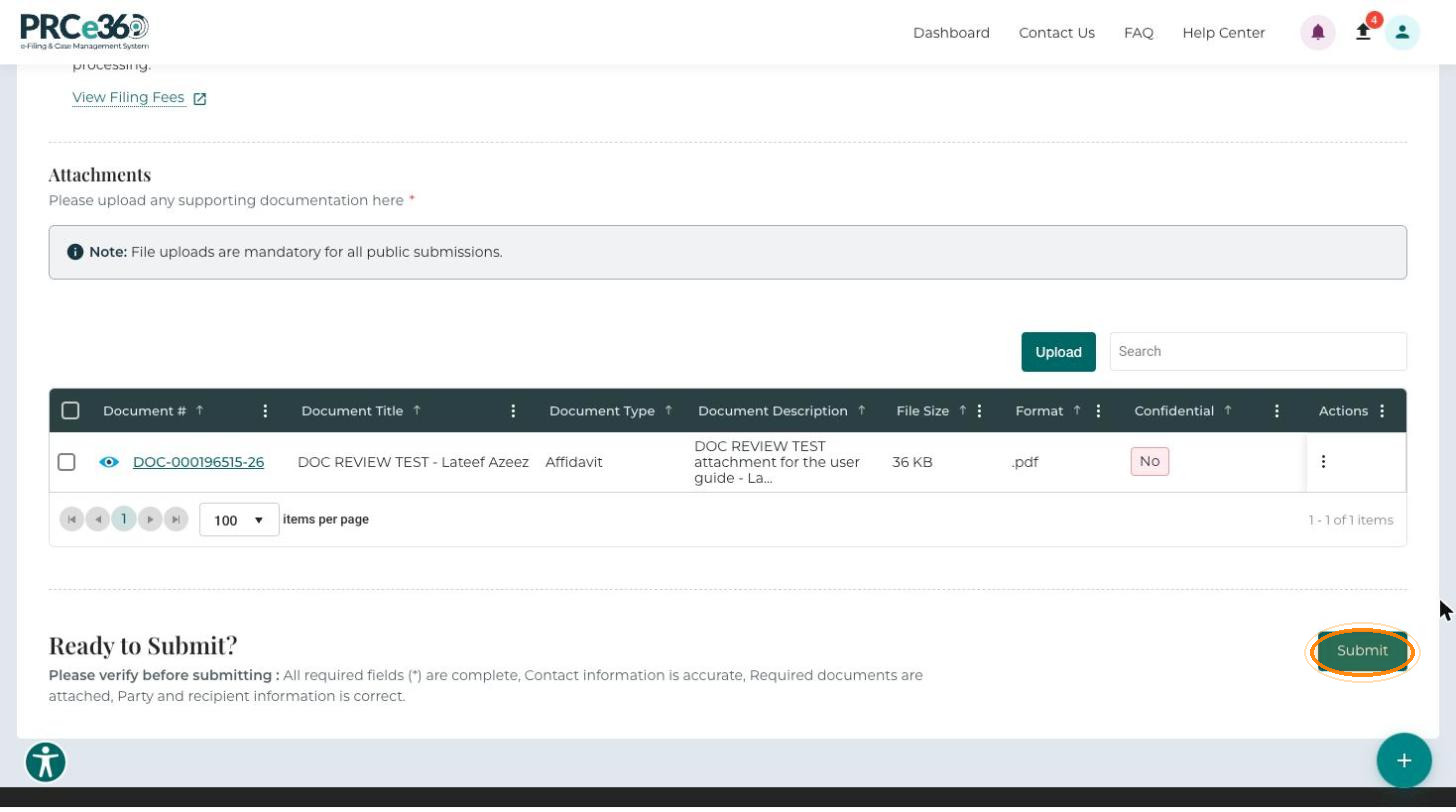
Check all entries and uploads. The Ready to Submit? section reminds you to check that all required fields are complete, contact information is accurate, required documents are attached, and party and recipient information is correct. Then click Submit.
-
The Submission Successful! message shows your Confirmation Number (for example, FLG-CNF-0000416-26). Click Go to Home to return to the Dashboard.
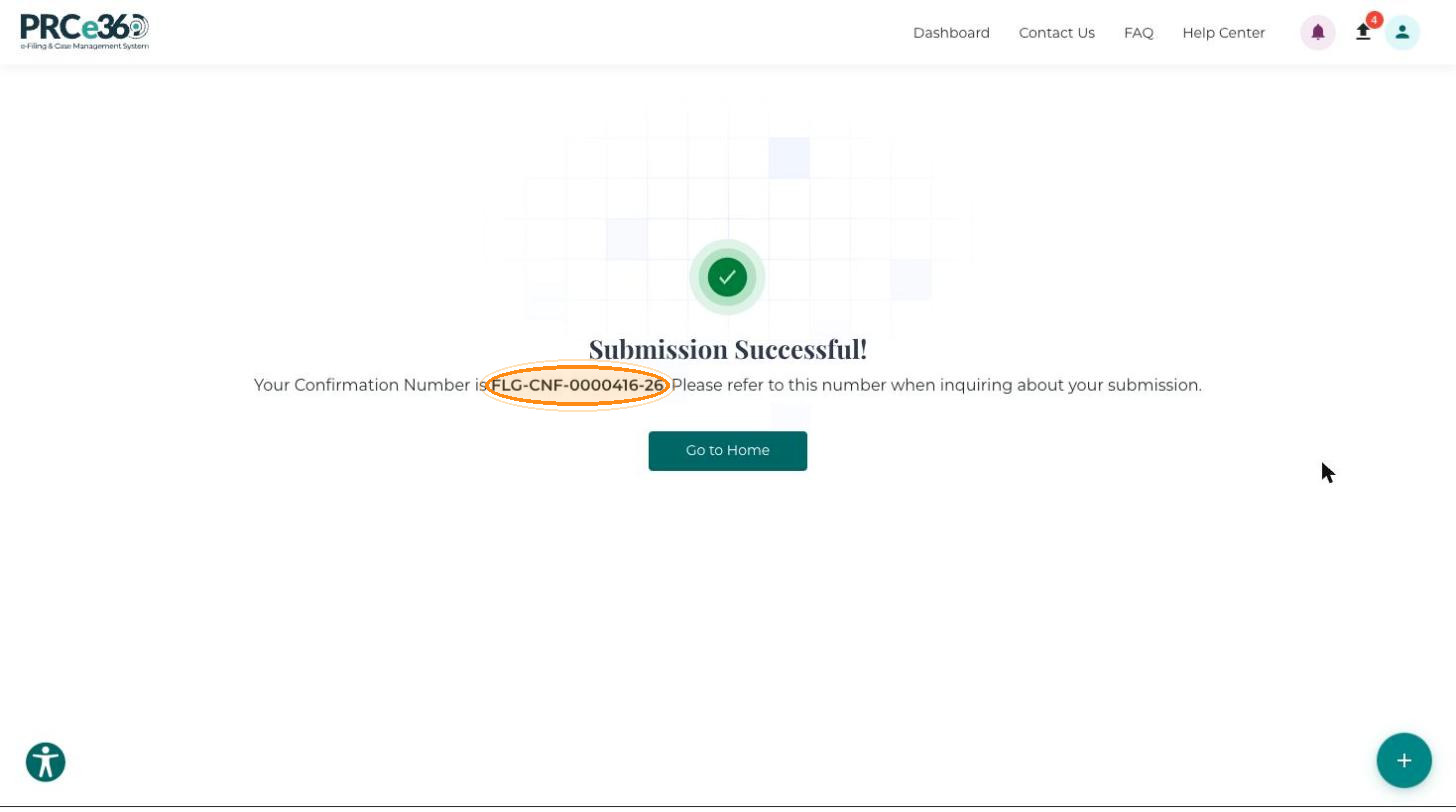
The filing goes to NMPRC staff for review.
Track the Filing
In the left menu, click My Docket Filings. The new filing appears in the list.
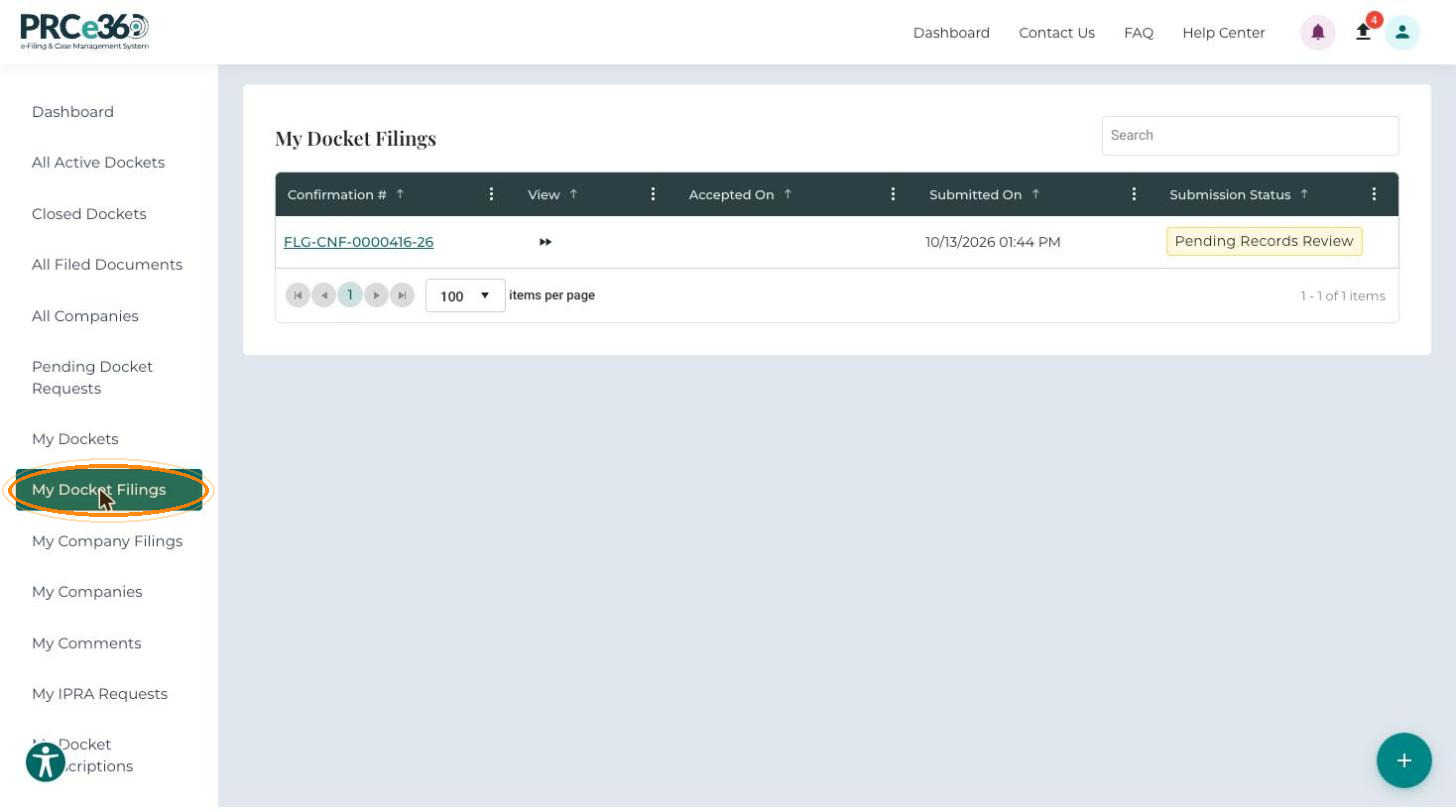
| Column | Description |
|---|---|
| Confirmation # | Unique identifier for the filing. |
| Accepted On | Date and time the PRC accepted the filing. |
| Submitted On | Date and time you submitted the filing. |
| Submission Status | Current review status, for example Pending, Accepted or Rejected. |
After PRC staff review the filing, the status changes to Accepted, or, if it is rejected, shows the rejection reason.
View Accepted Documents
Only filings accepted by PRC staff appear on the docket's Documents tab.
-
Open the docket in Docket 360, for example from All Active Dockets or My Dockets.
-
Open the Documents tab. The Pleading Documents sub-tab lists all accepted filings.