My Items
The My lists in the left menu show only what you submitted or manage: your filings, companies, comments, IPRA requests and docket subscriptions. Your own dockets are covered in My Dockets.
| User type | What they can use |
|---|---|
| Tier 1 | My Docket Filings, My Company Filings, My Comments, My IPRA Requests and My Docket Subscriptions. |
| Tier 2 | All of the above, plus My Companies. |
My Docket Filings
My Docket Filings lists the documents you filed into existing dockets and formal complaints through Submit New.
-
In the left menu, click My Docket Filings.
Column Description Confirmation # The filing request's unique number. Click it to open the filing. View Opens the filing. Accepted On Date and time Records staff approved the filing request. Submitted On Date and time you submitted the filing. Submission Status For example Pending Records Review, Accepted or Rejected. 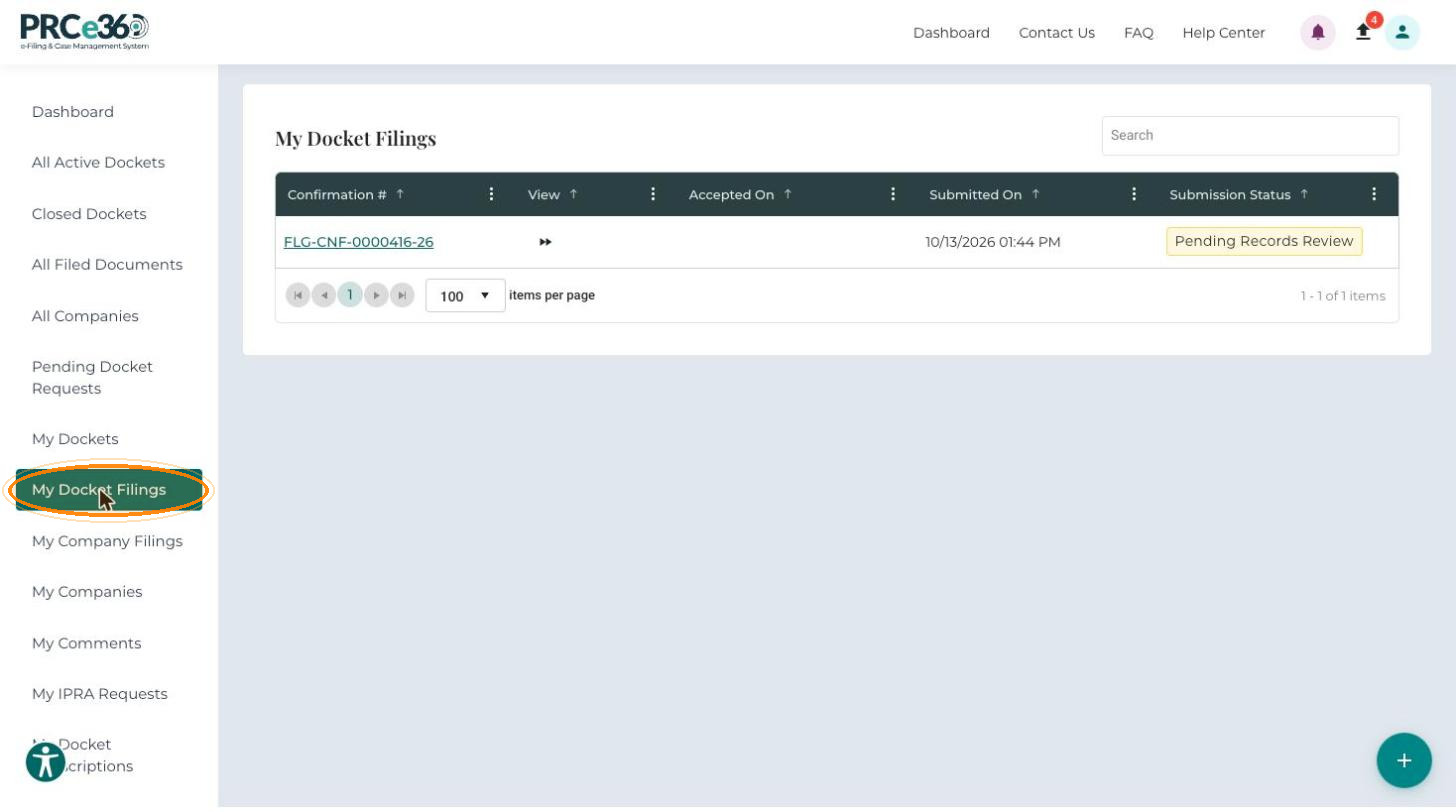
-
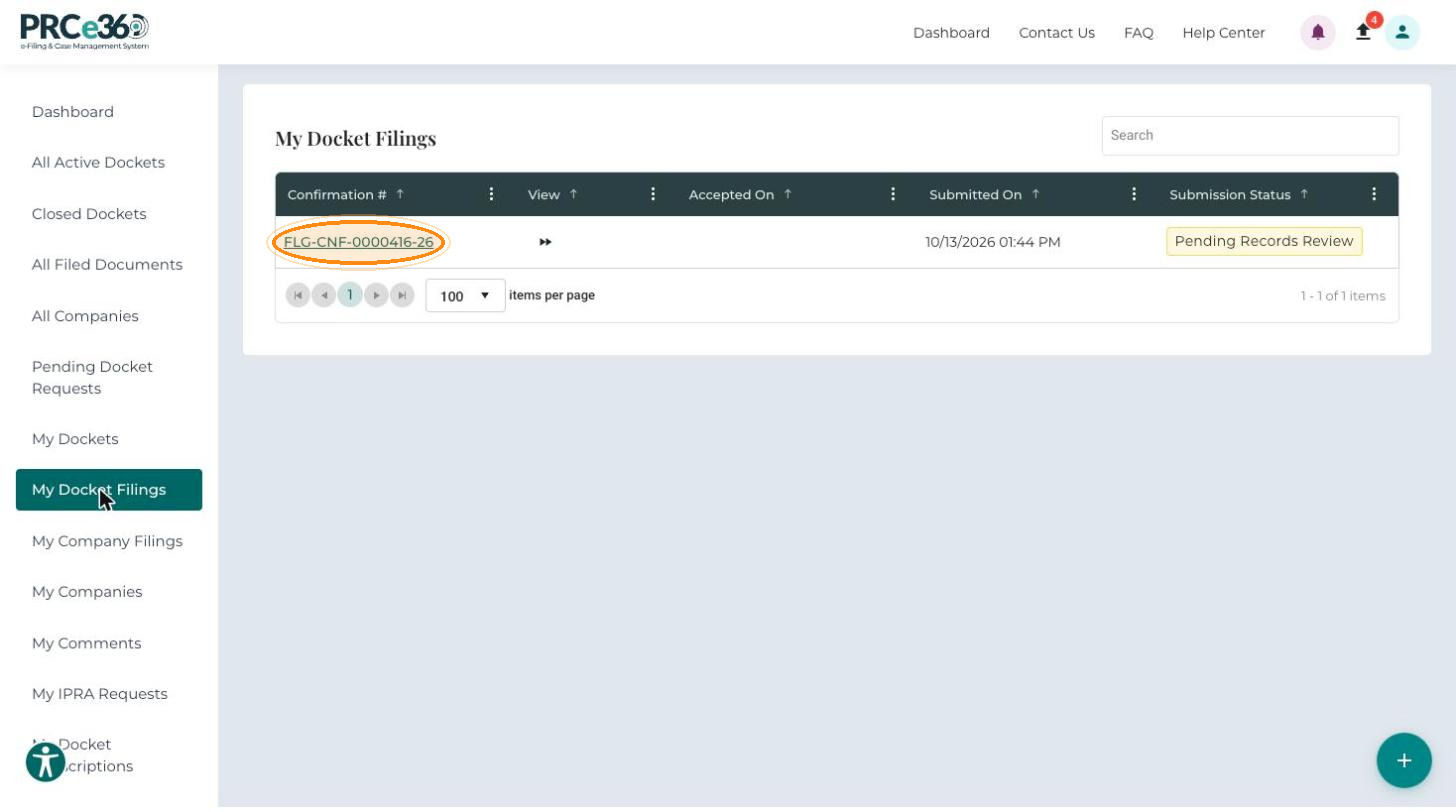
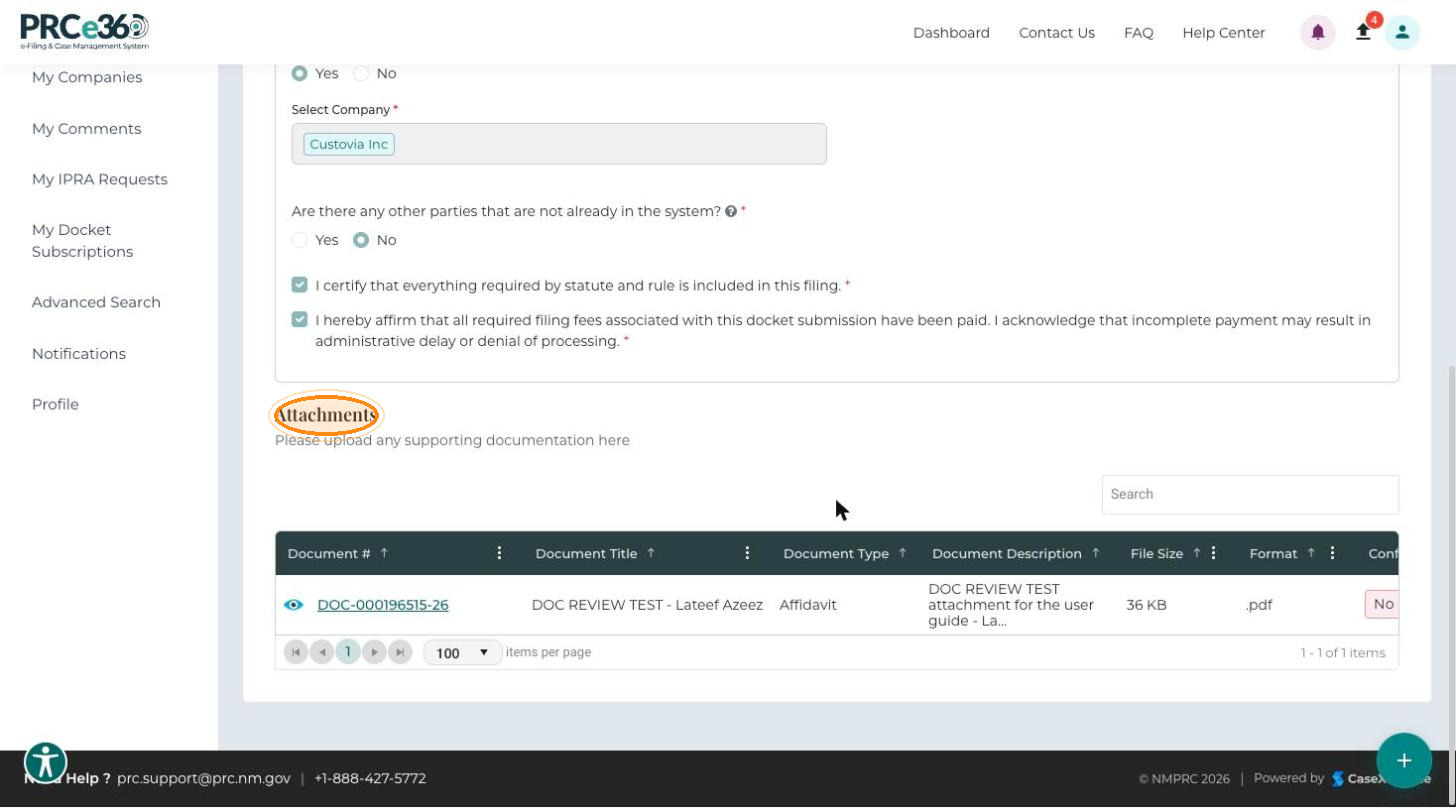
Click a Confirmation # (for example, FLG-CNF-0000001-26) to open the Public Filing Request page.
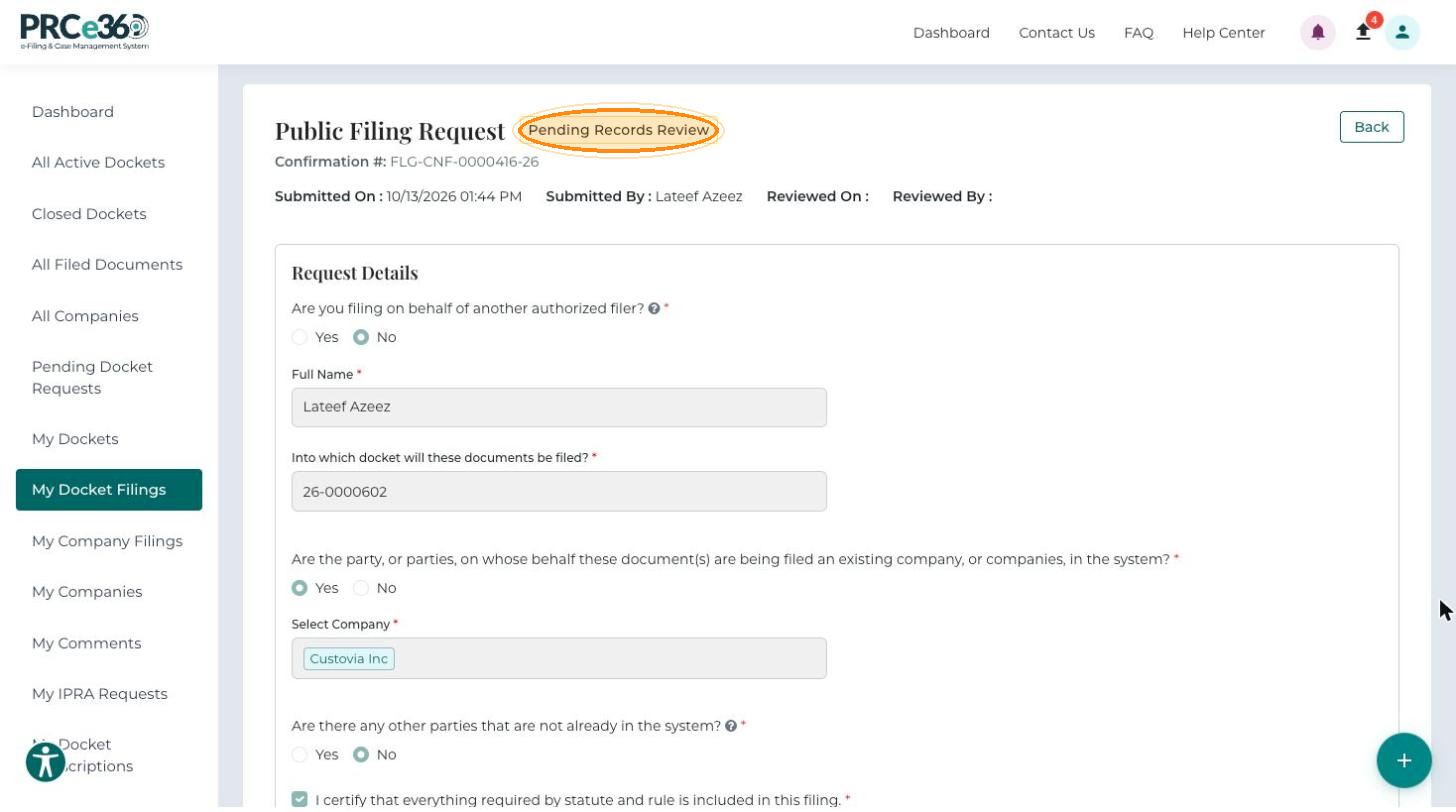
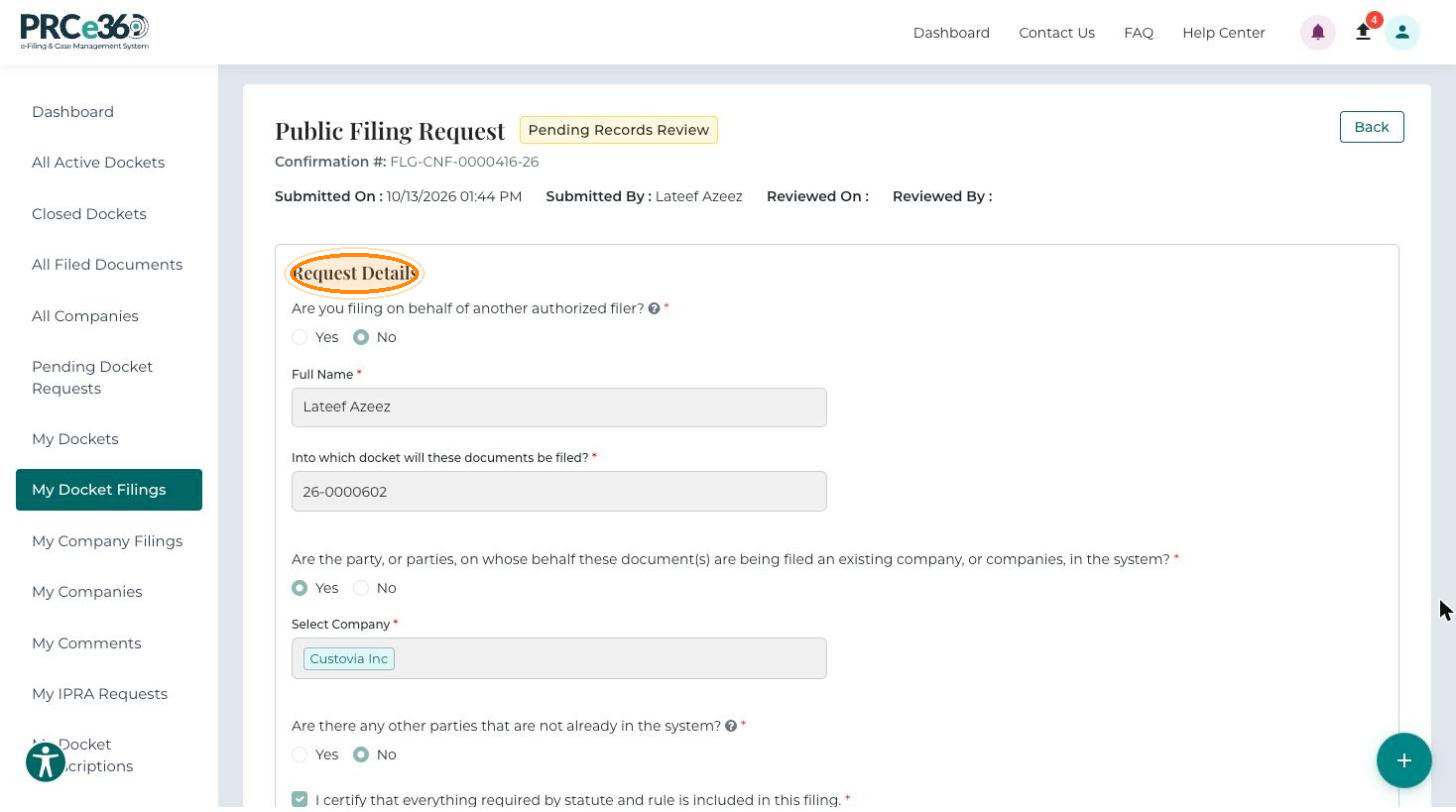
The page shows the filing status with Submitted On, Submitted By, Reviewed On and Reviewed By (filled in once PRC staff review the filing), then the Request Details and Attachments sections. Click Back to return to the list.
My Company Filings
My Company Filings lists the filings you submitted for a company. It has the same layout as My Docket Filings, plus a Company column.
- Confirmation #
- View
- Accepted On
- Submitted On
- Company
- Submission Status
My Companies
My Companies is available to Tier 2 users who registered a company or were given company management access by PRC staff. It lists every company you are associated with.
-
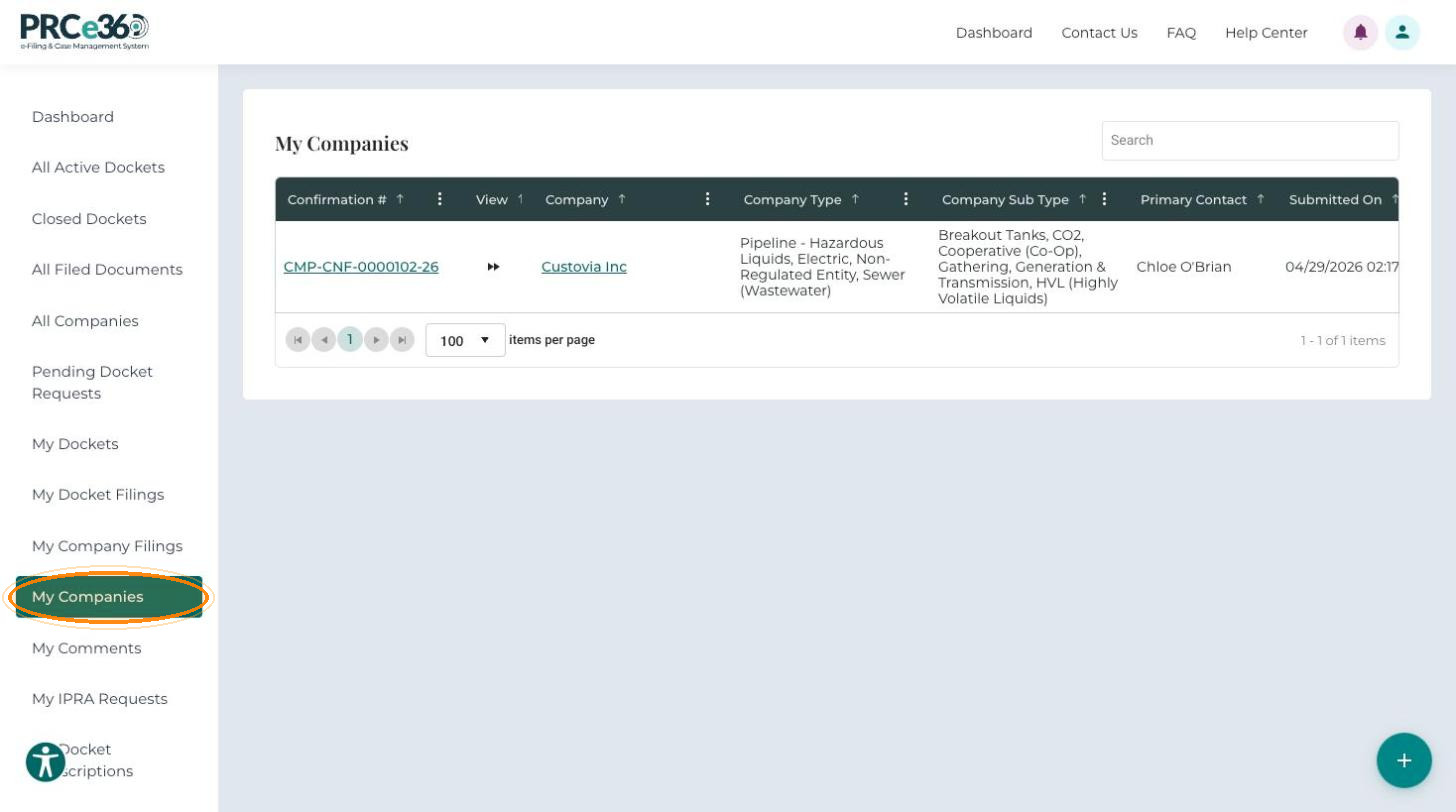
In the left menu, click My Companies.
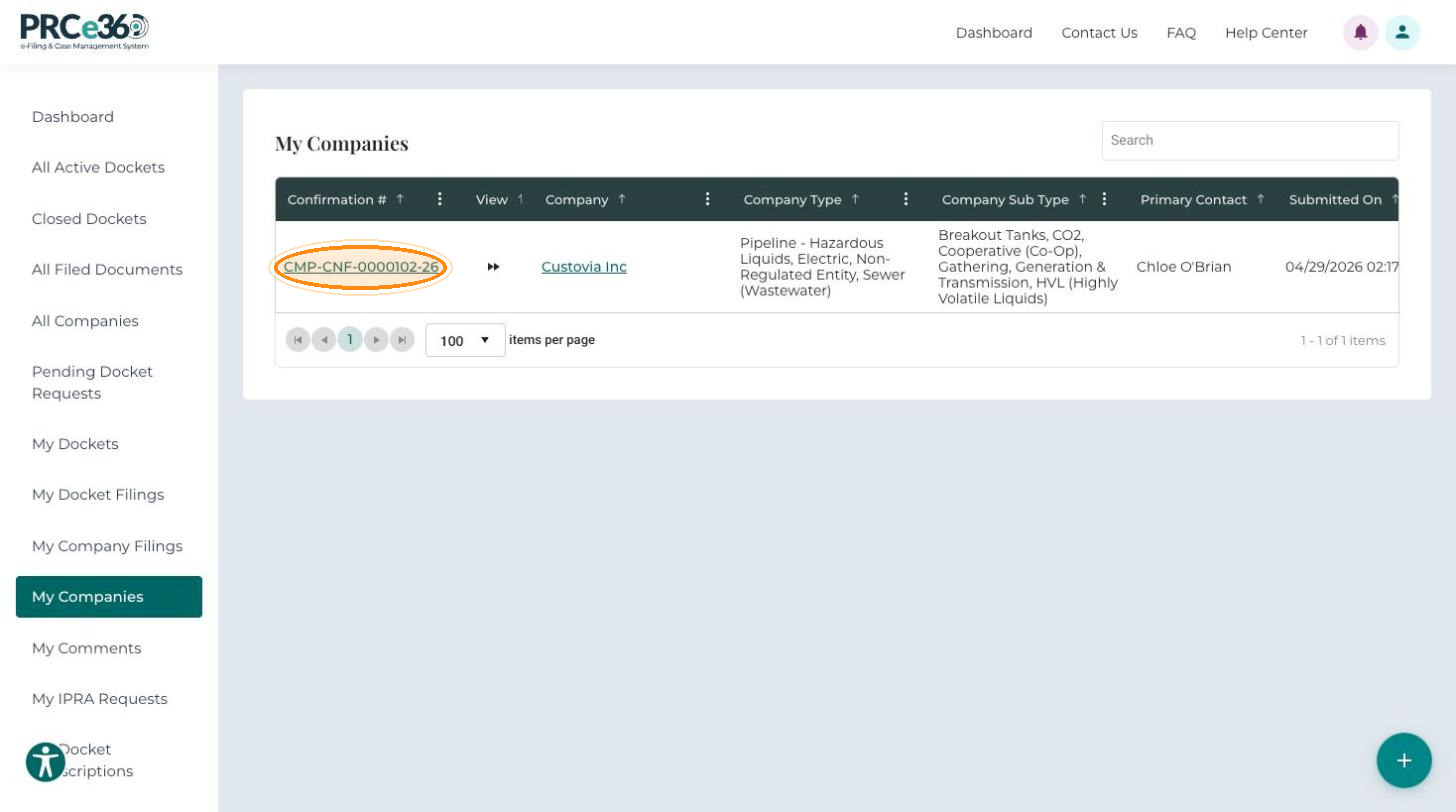
Column Description Confirmation # The number given when the company registration was submitted. Click it to open the company. View Opens the company. Company The registered company name. Company Type The industry type, for example Telecommunications or Electric. Company Sub Type The subcategory of the type, for example Cooperative (Co-Op). Primary Contact The company's main point of contact. Submitted On Date and time the registration was submitted. Status Active, Pending or Rejected. The Company name is also a link to the company.
-
Click a Confirmation # or the company name to open the company in Company 360.
Company 360 has the Company Details, Dockets, Documents, Contacts, Managers and Comments tabs, described in Documents & Companies. Because you manage the company, you can also:
- Click Edit in the Company Information section to update the company's details.
- Add, view and edit the company's contacts on the Contacts tab.
- Add or remove managers on the Managers tab.
To register another company, use Submit New (see Register a New Company).
My Comments
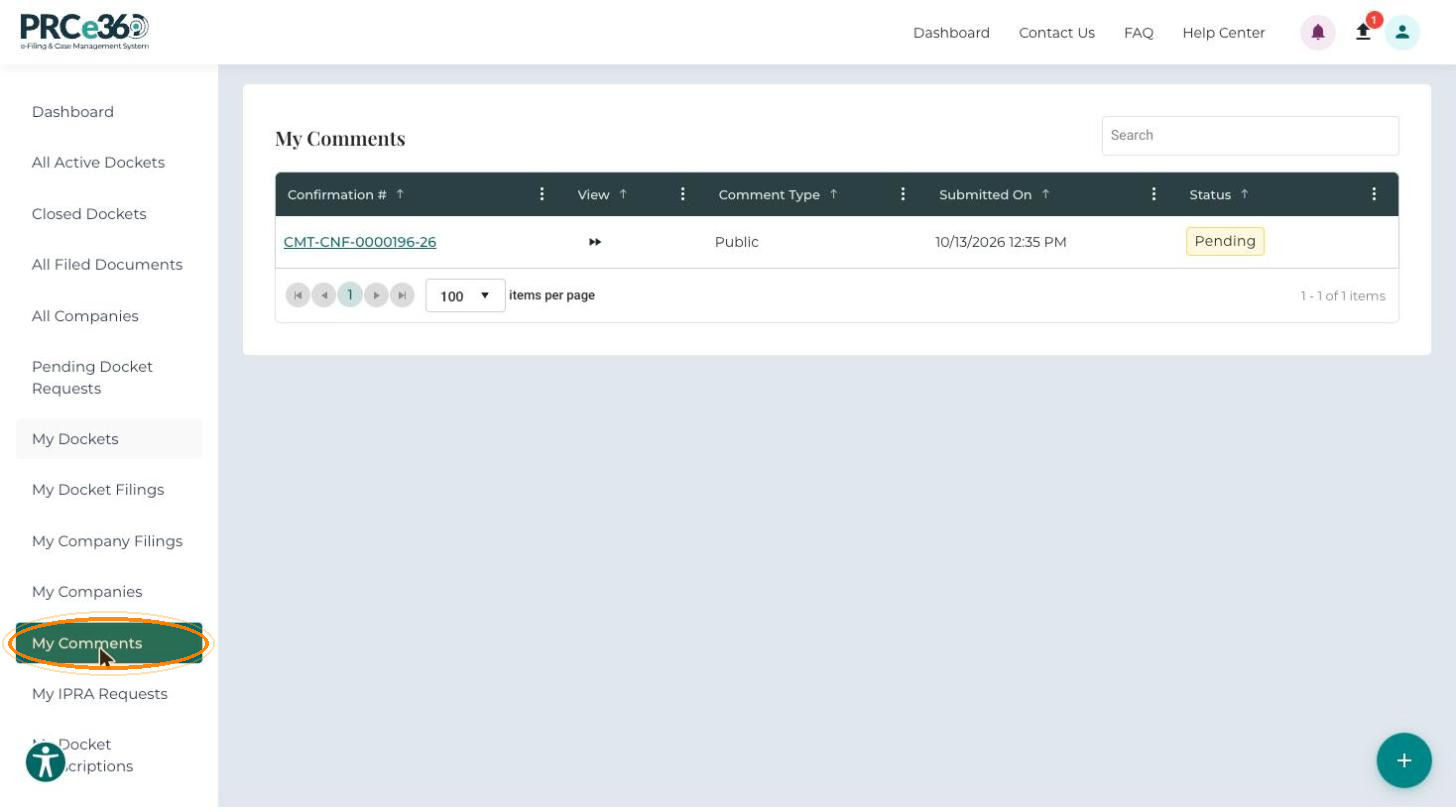
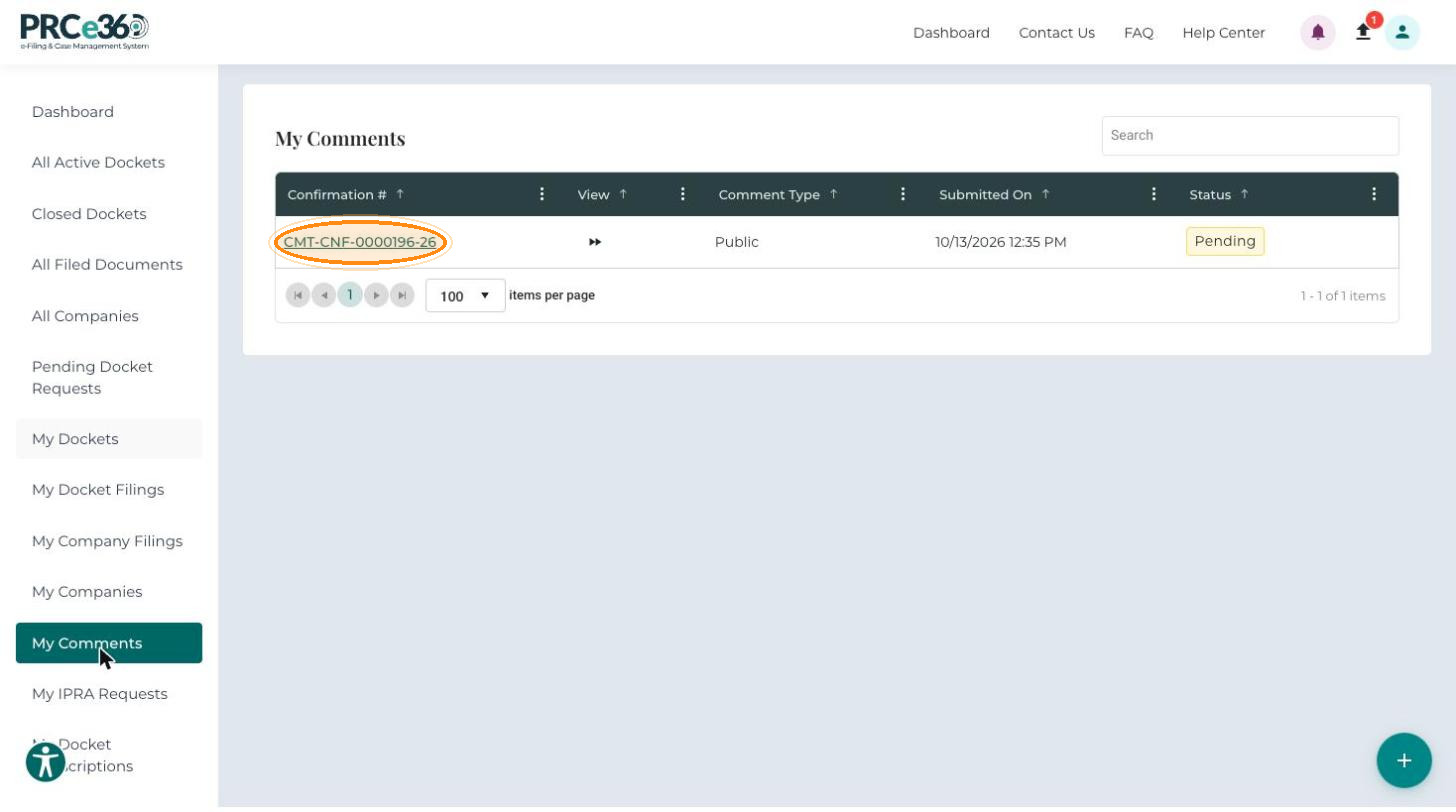
My Comments lists all comments you submitted, with their status.
-
In the left menu, click My Comments.
Columns- Confirmation #
- View
- Comment Type
- Submitted On
- Status
-
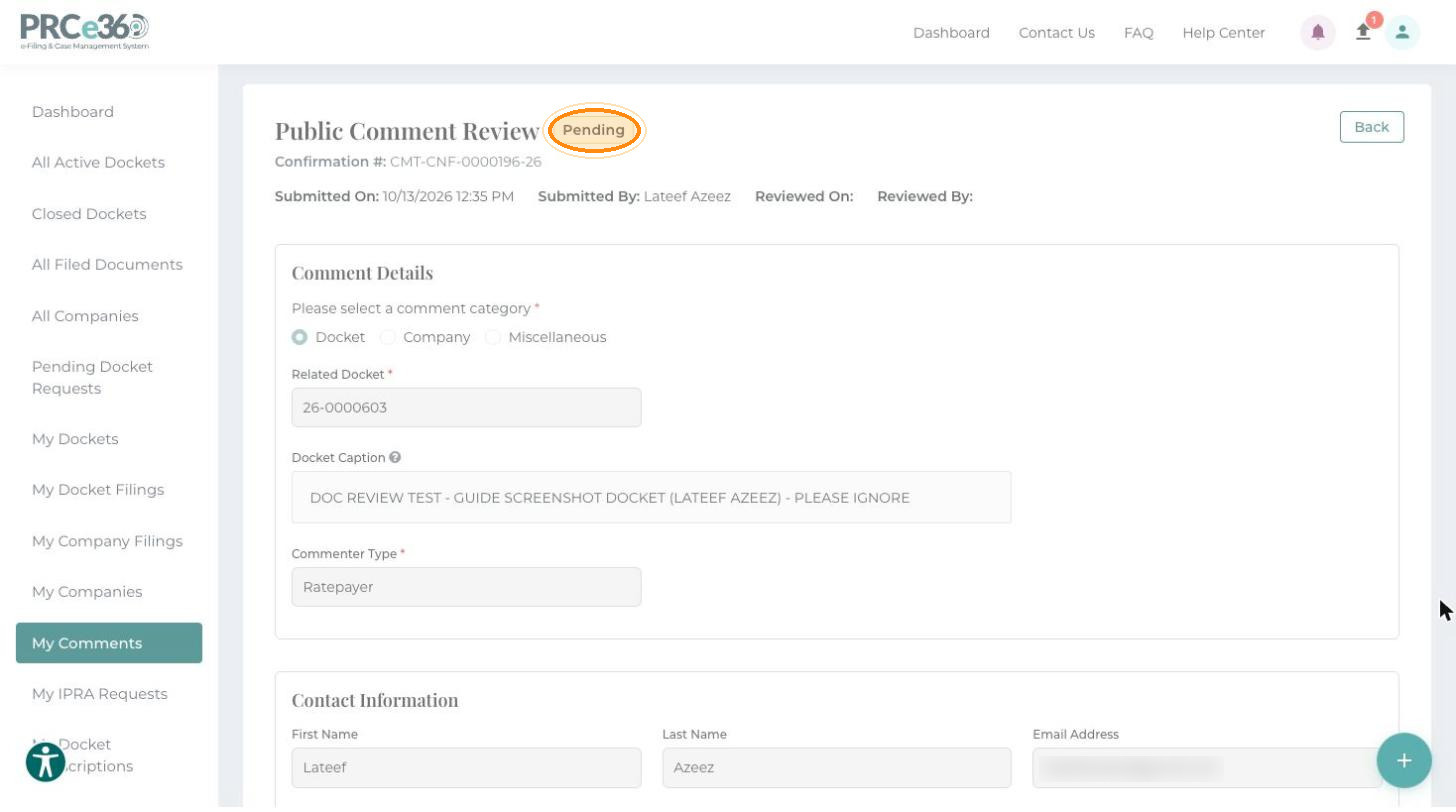
Click a Confirmation # to open the comment's Public Comment Review page.
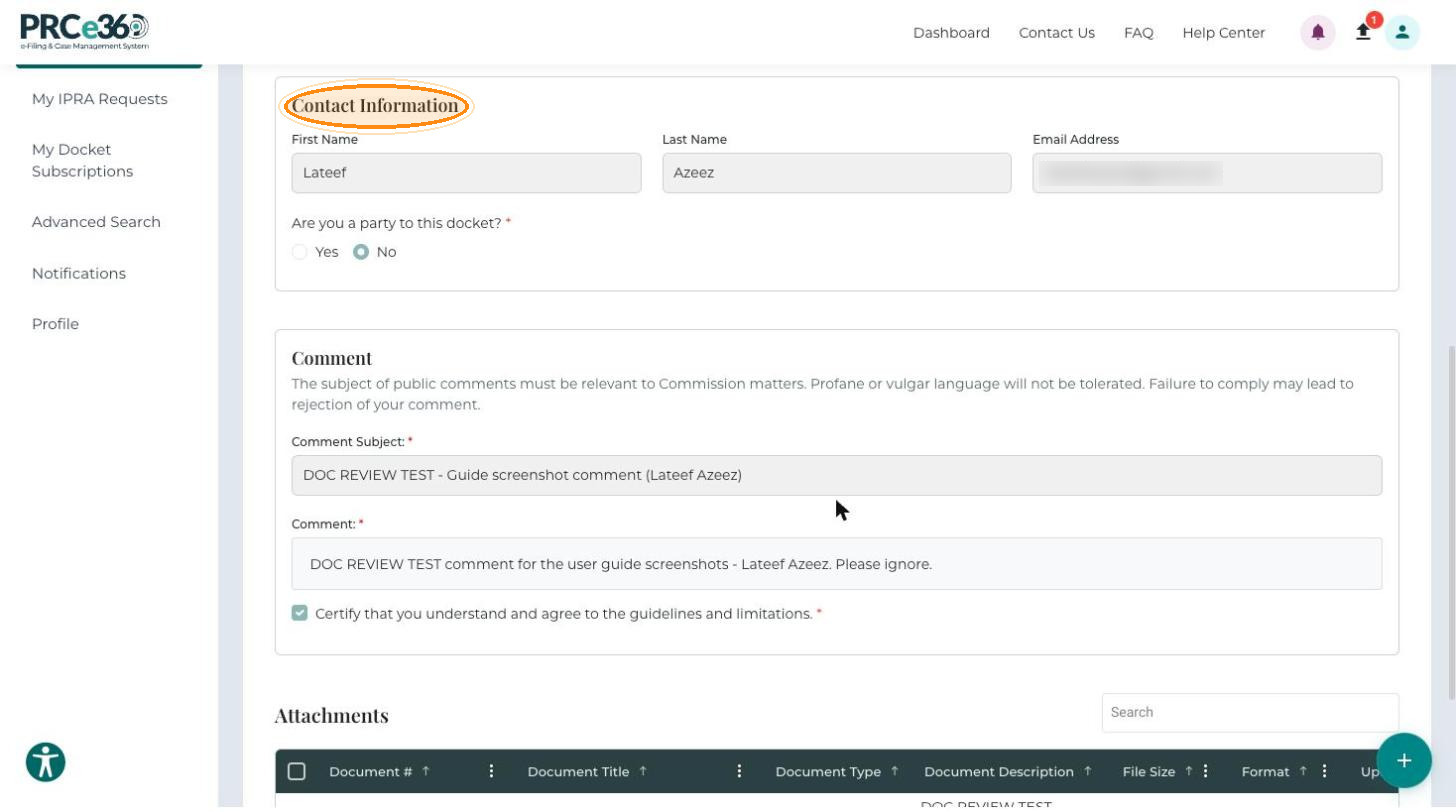
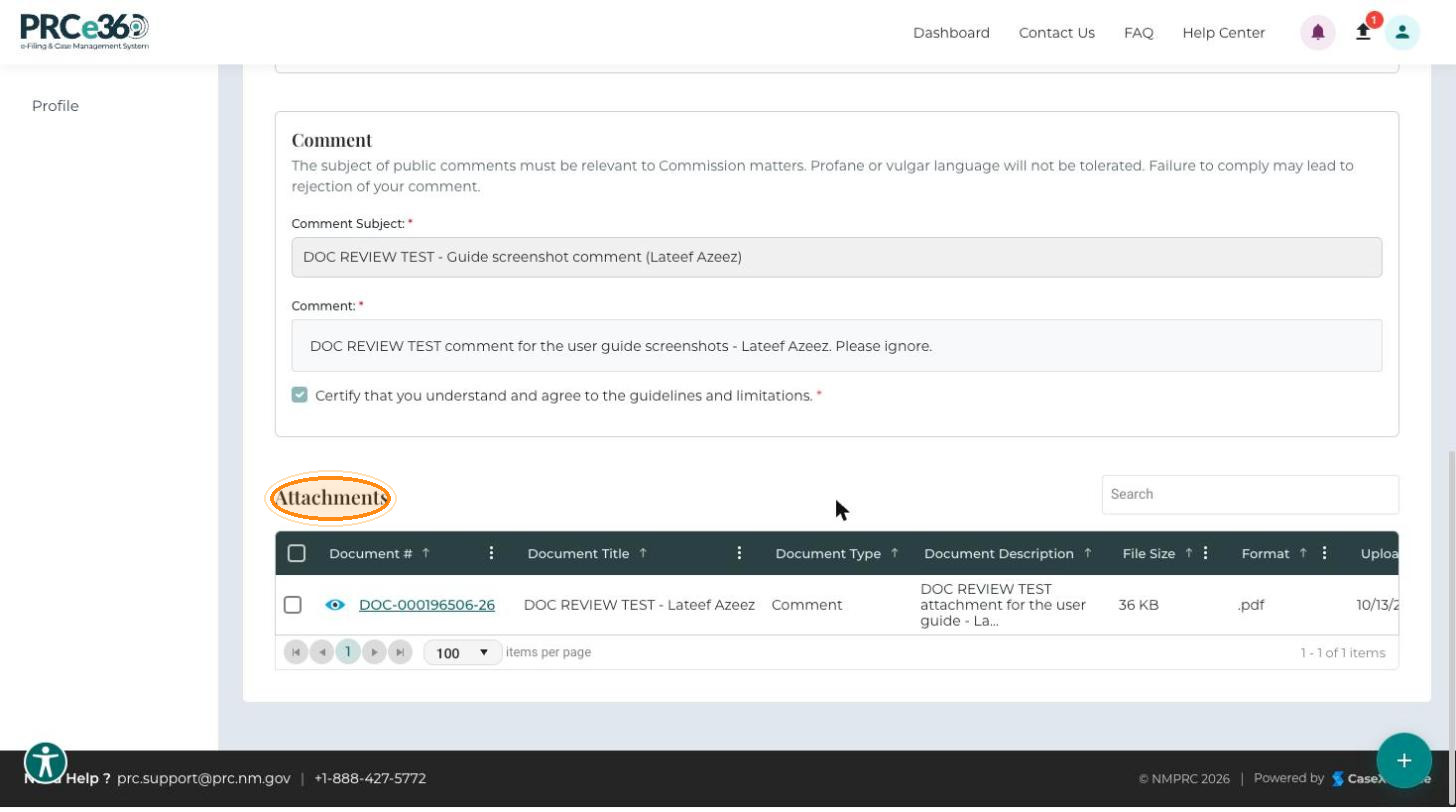
The page shows the comment's status, Submitted On, Submitted By, Reviewed On and Reviewed By, followed by the Comment Details, Contact Information, Comment and Attachments sections.
My IPRA Requests
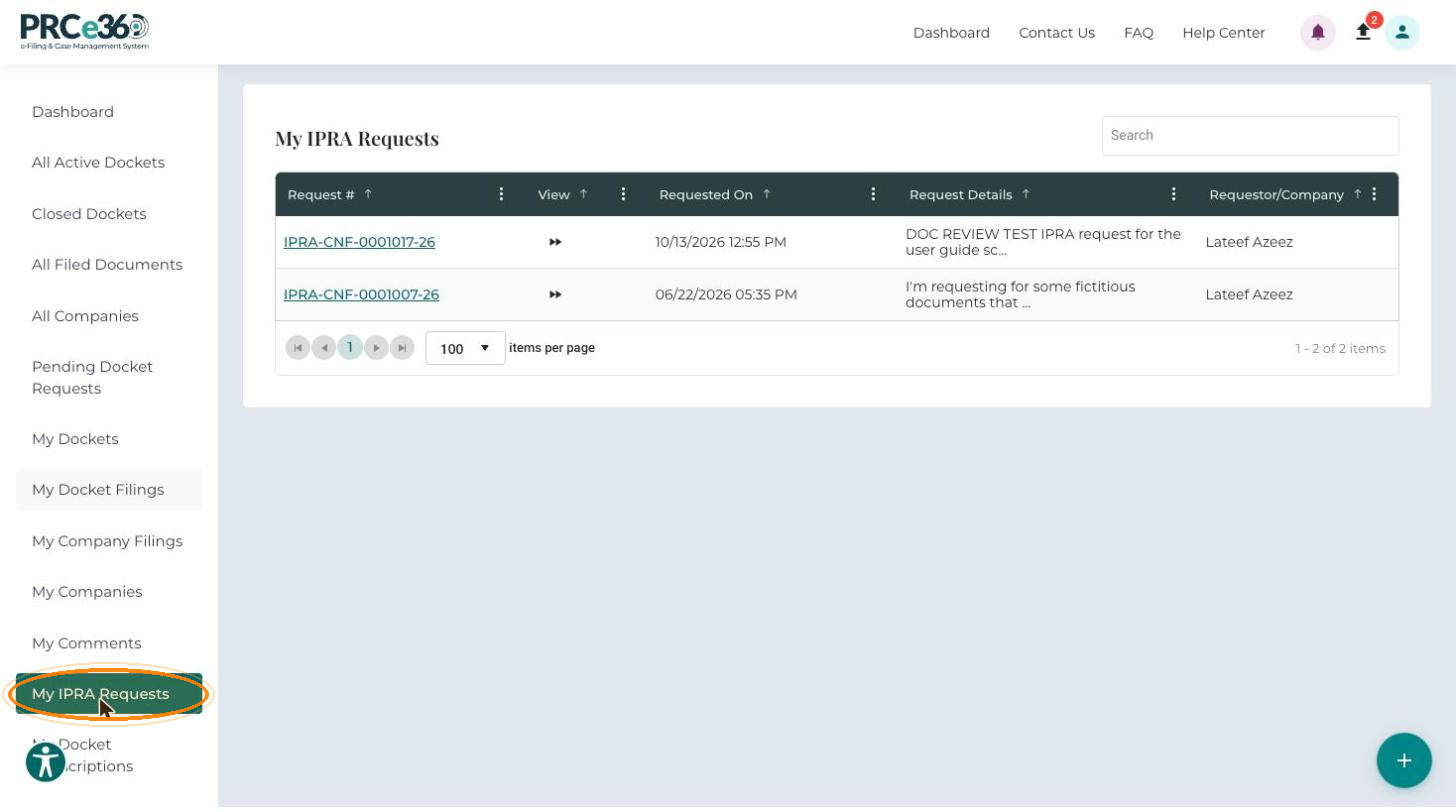
My IPRA Requests lists all Inspection of Public Records Act (IPRA) requests you submitted.
-
In the left menu, click My IPRA Requests.
Columns- Request #
- View
- Requested On
- Request Details
- Requestor/Company
-
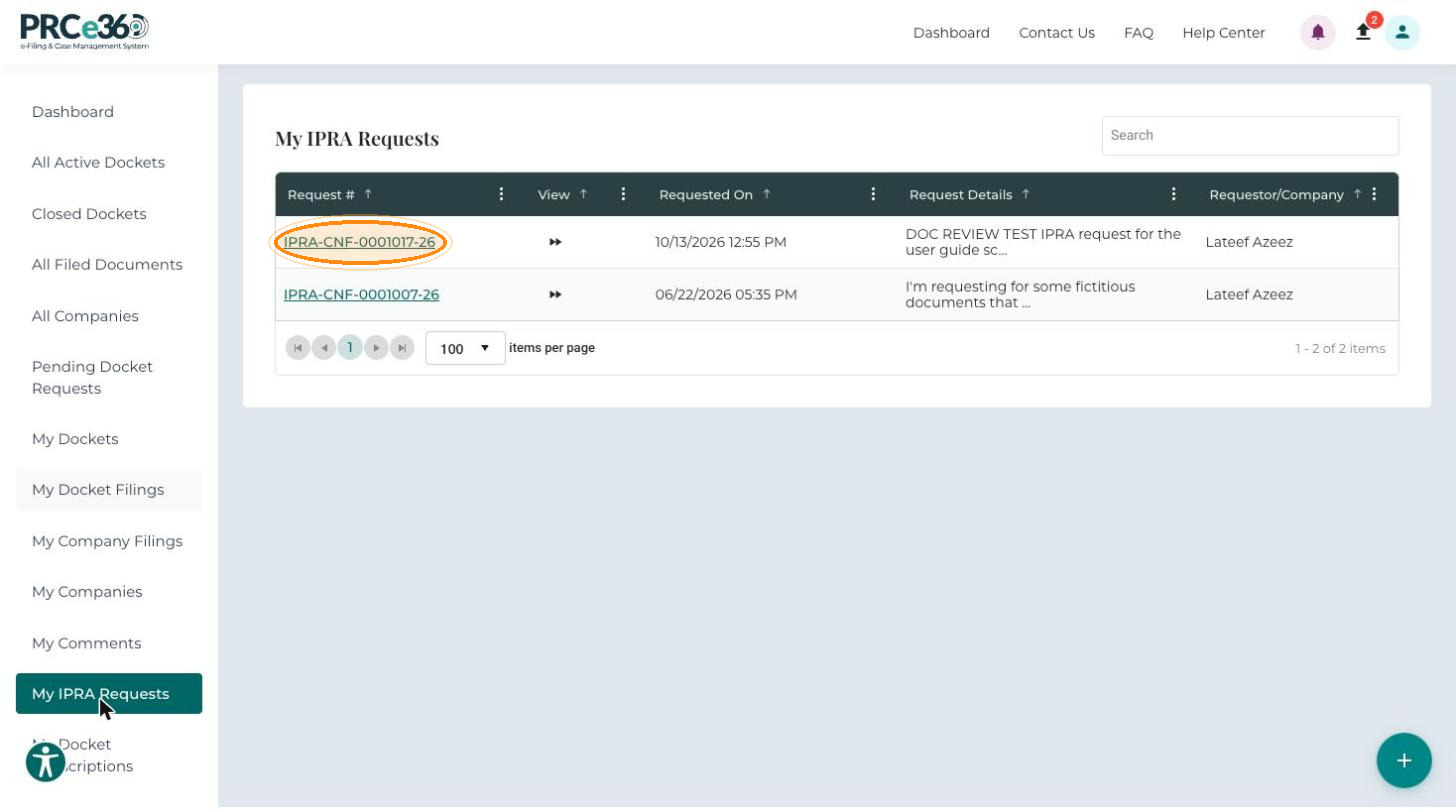
Click a Request # to open the request in IPRA 360.
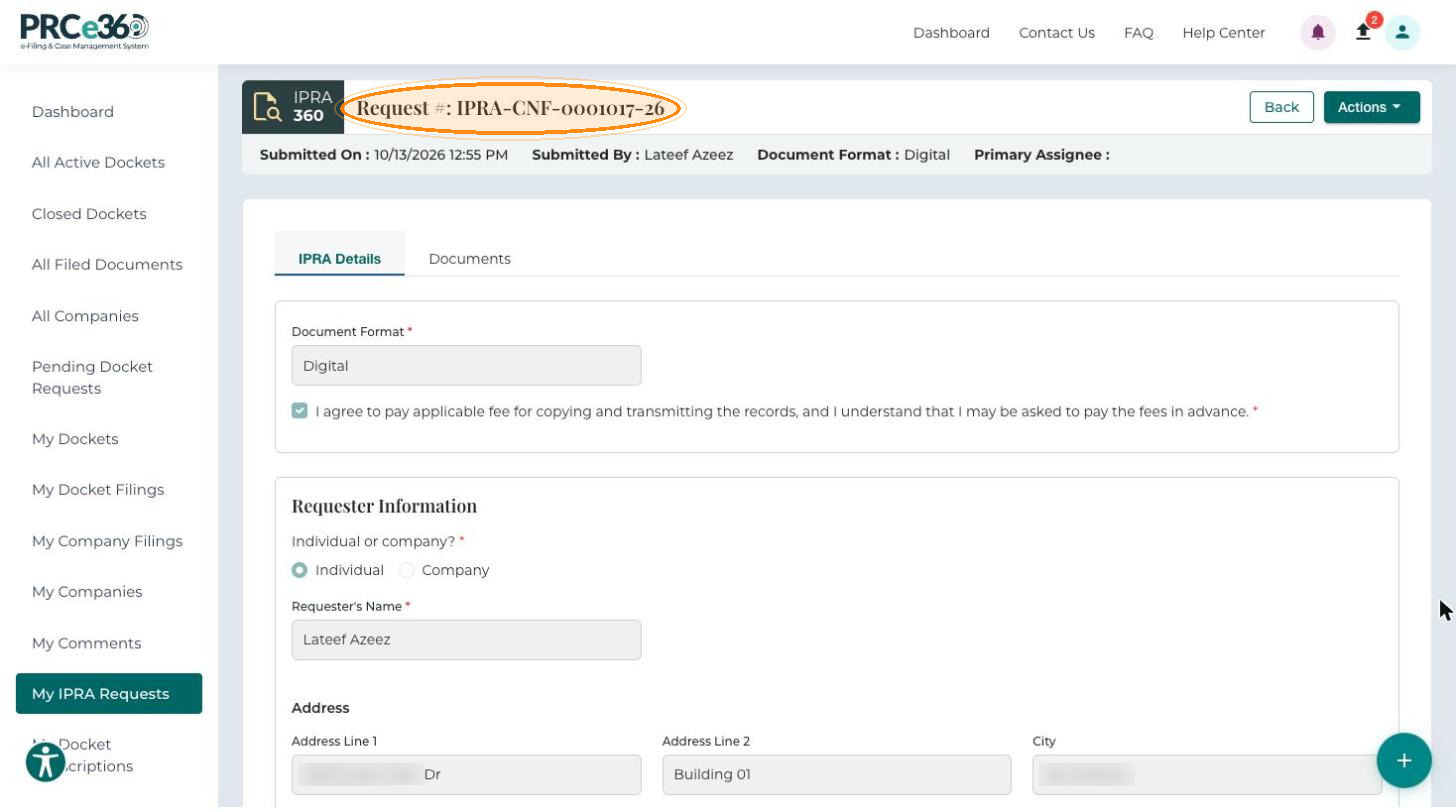
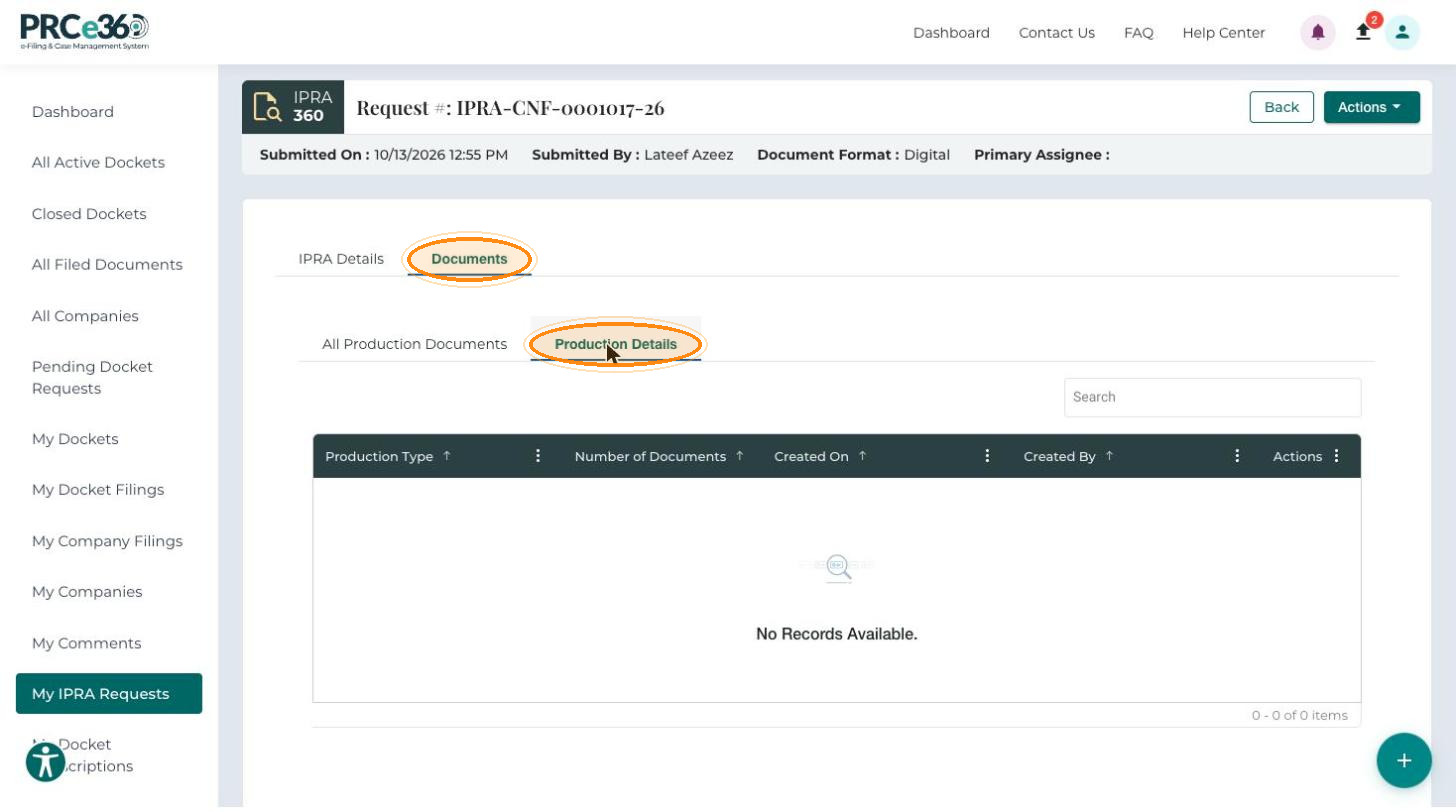
The header shows the Request #, Submitted On, Submitted By, Document Format and Primary Assignee. From Actions you can withdraw the request. The request has two tabs:
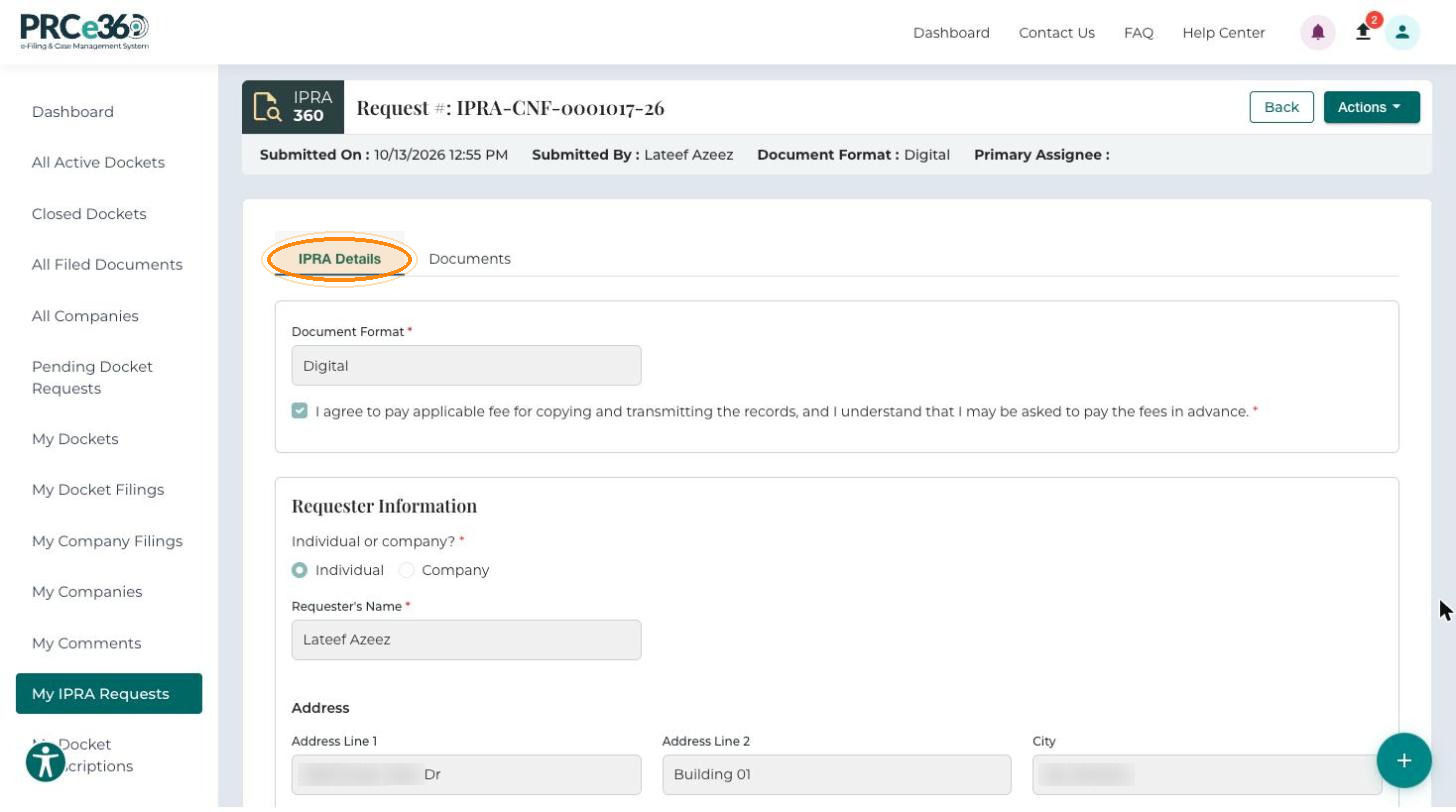
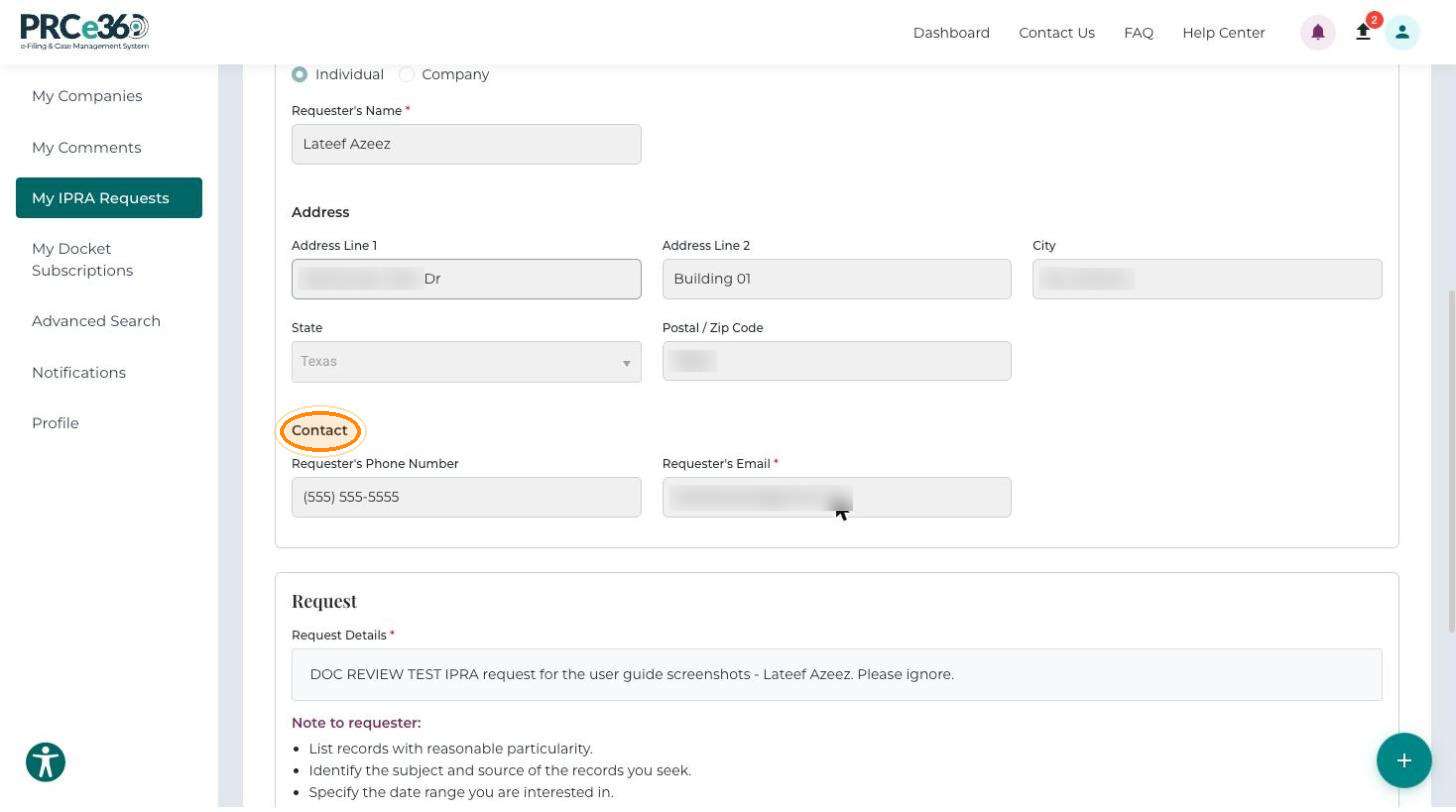
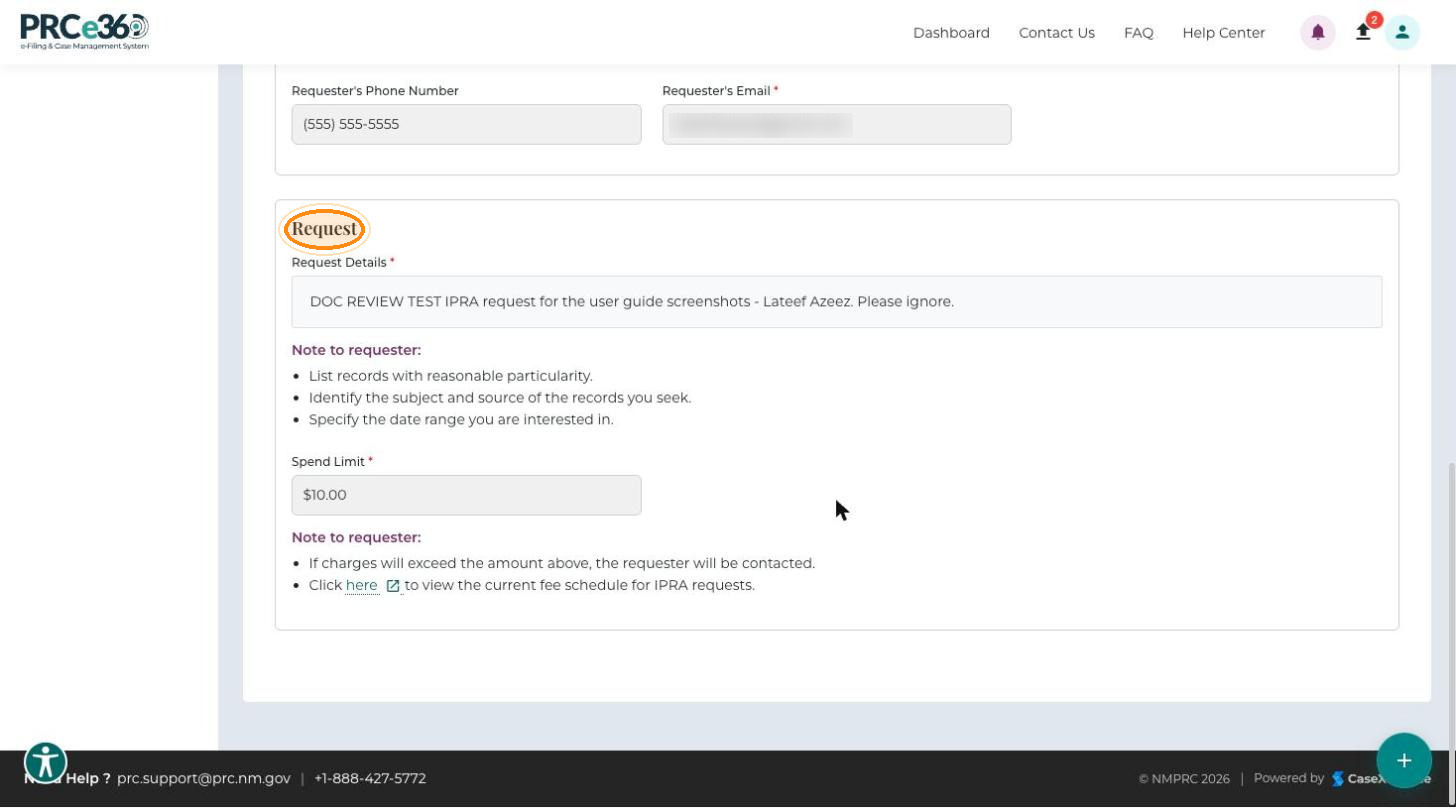
- IPRA Details – the information you submitted: Document Format, Requester Information (name, address and contact details) and the Request section with your Request Details and Spend Limit. The Note to requester text in the Request section explains how to describe the records you want, that you will be contacted if charges will exceed your spend limit, and links to the current IPRA fee schedule.
- Documents – the documents produced for your request, on the All Production Documents and Production Details sub-tabs.
- Production Type
- Number of Documents
- Created On
- Created By
- Actions
For the full IPRA process, see Manage Your IPRA Request.
My Docket Subscriptions
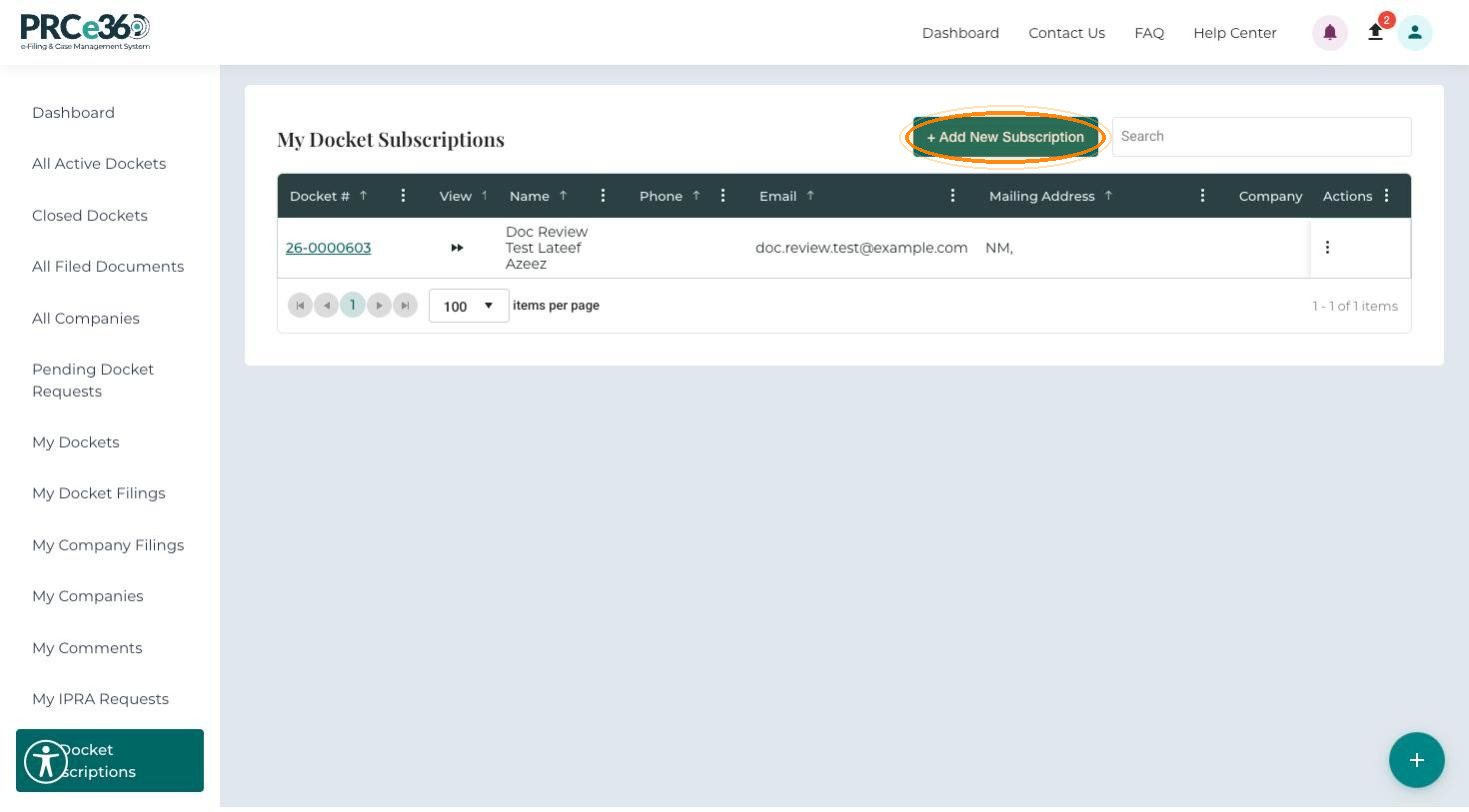
My Docket Subscriptions lets Tier 1 and Tier 2 users view and manage the dockets they subscribe to for automatic notifications. You can add subscriptions, update them, or remove subscribers you added.
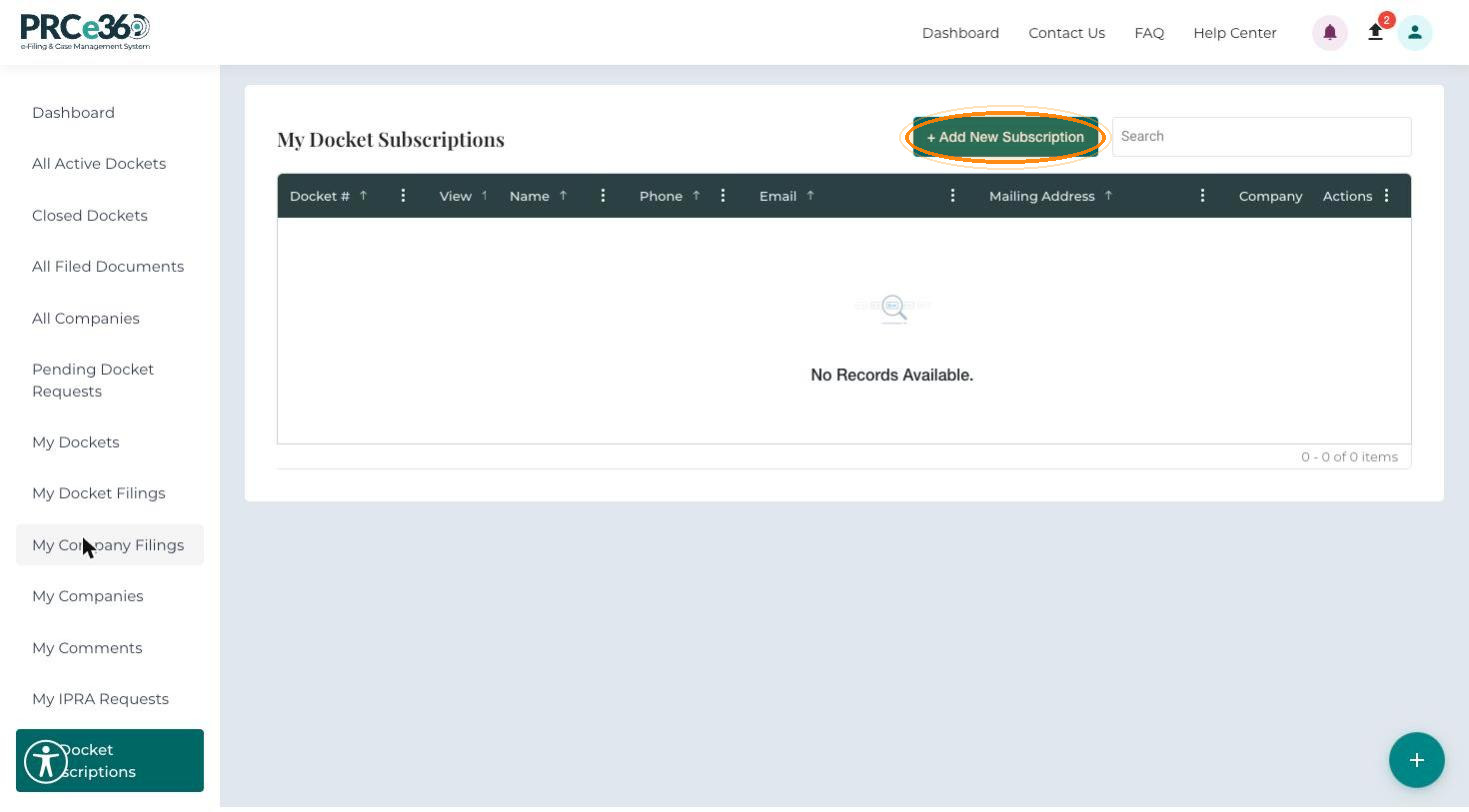
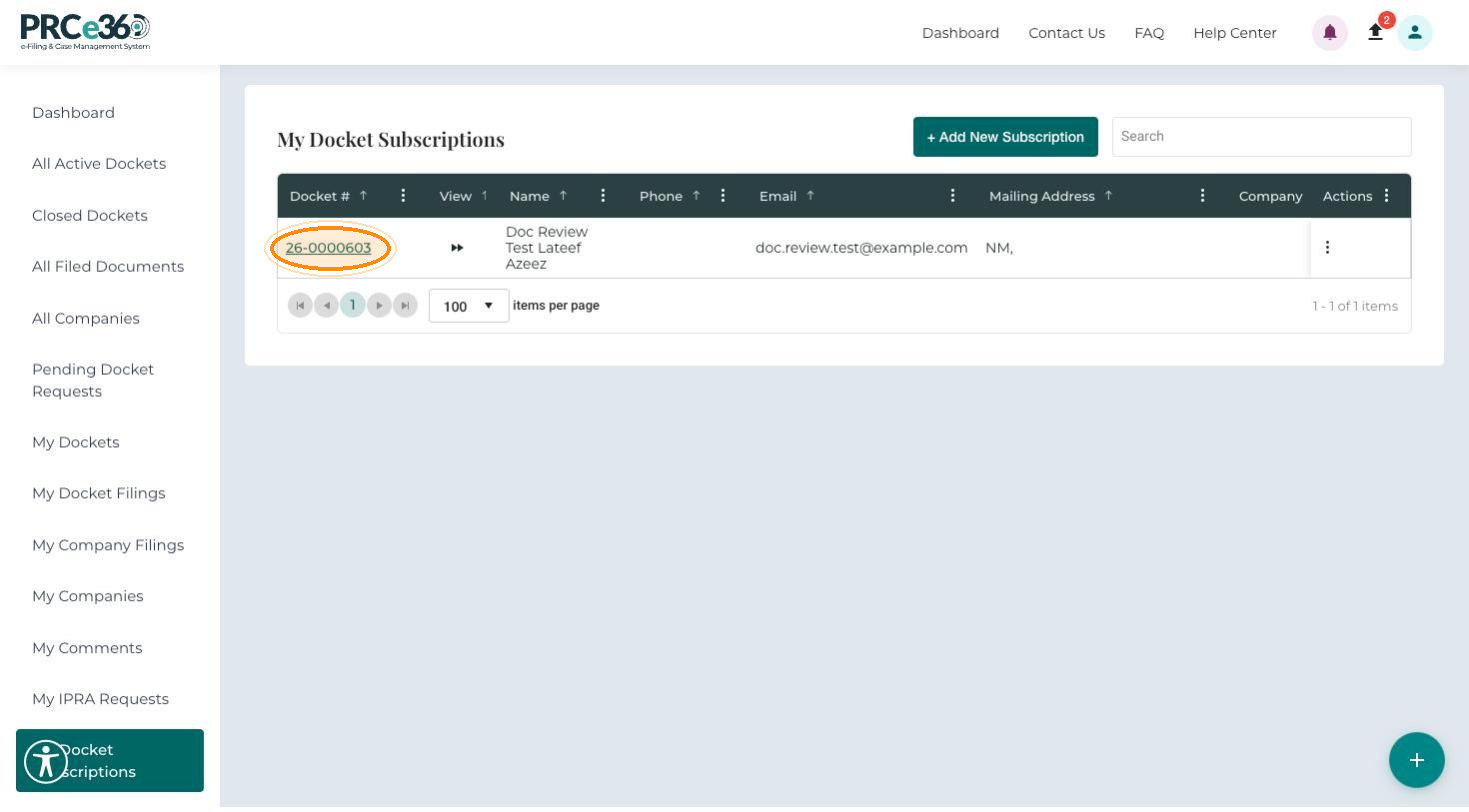
In the left menu, click My Docket Subscriptions. The list shows each subscribed docket and recipient.
| Column | Description |
|---|---|
| Docket # | The subscribed docket. Click it to open the docket. |
| View | Opens the docket. |
| Name | The subscriber (you or another contact). |
| Phone | The subscriber's phone number. |
| Where notification alerts are sent. | |
| Mailing Address | The subscriber's mailing address. |
| Company | The company, for a company or organization subscriber. |
| Actions | Edit or Remove the subscription. |
Add a Subscription
-
Click + Add New Subscription.
-
In Docket Number*, type the docket number and select the docket from the list.
-
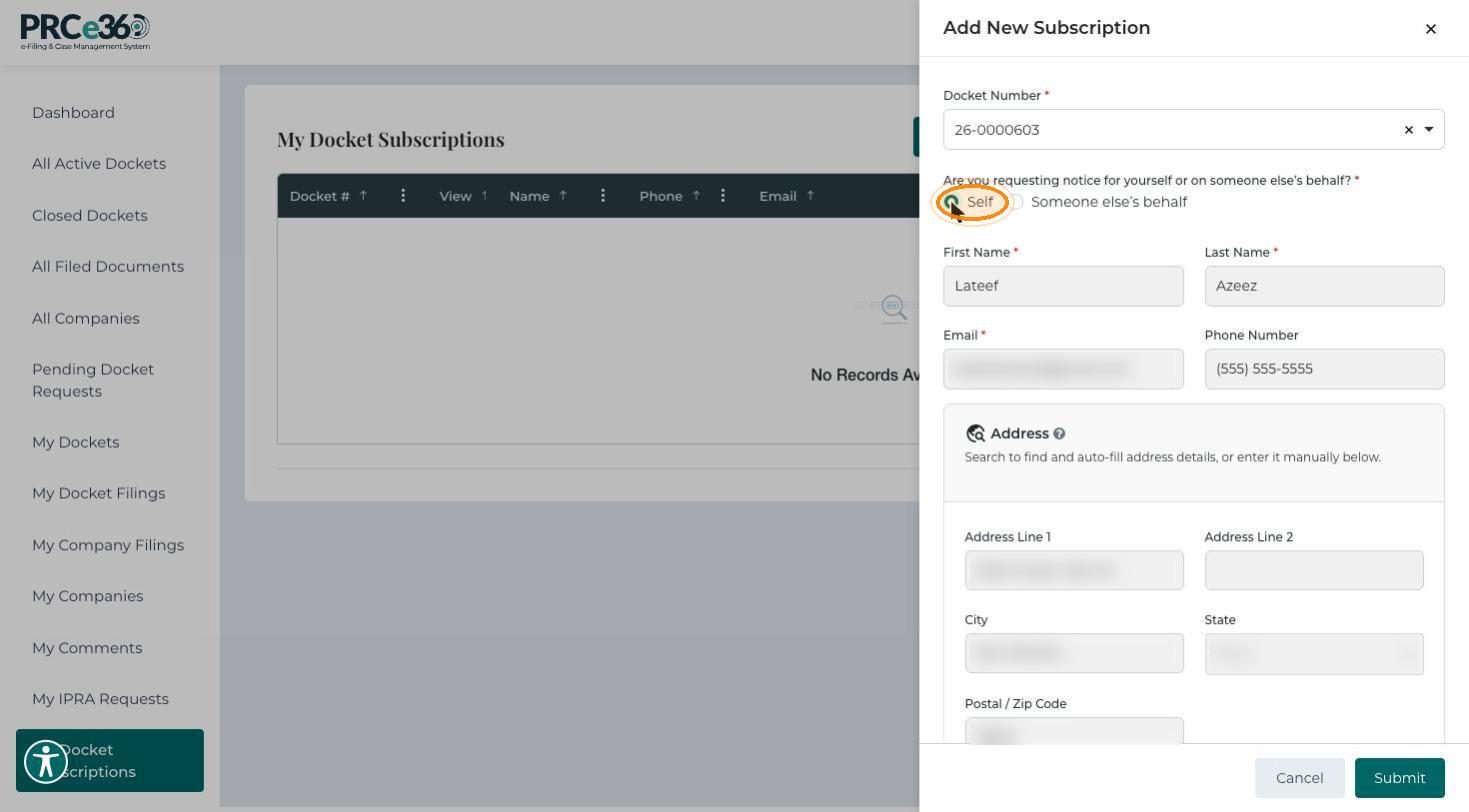
Answer Are you requesting notice for yourself or on someone else's behalf?*
-
Self – your name, email, phone number and address fill in from your profile and cannot be changed here.
-
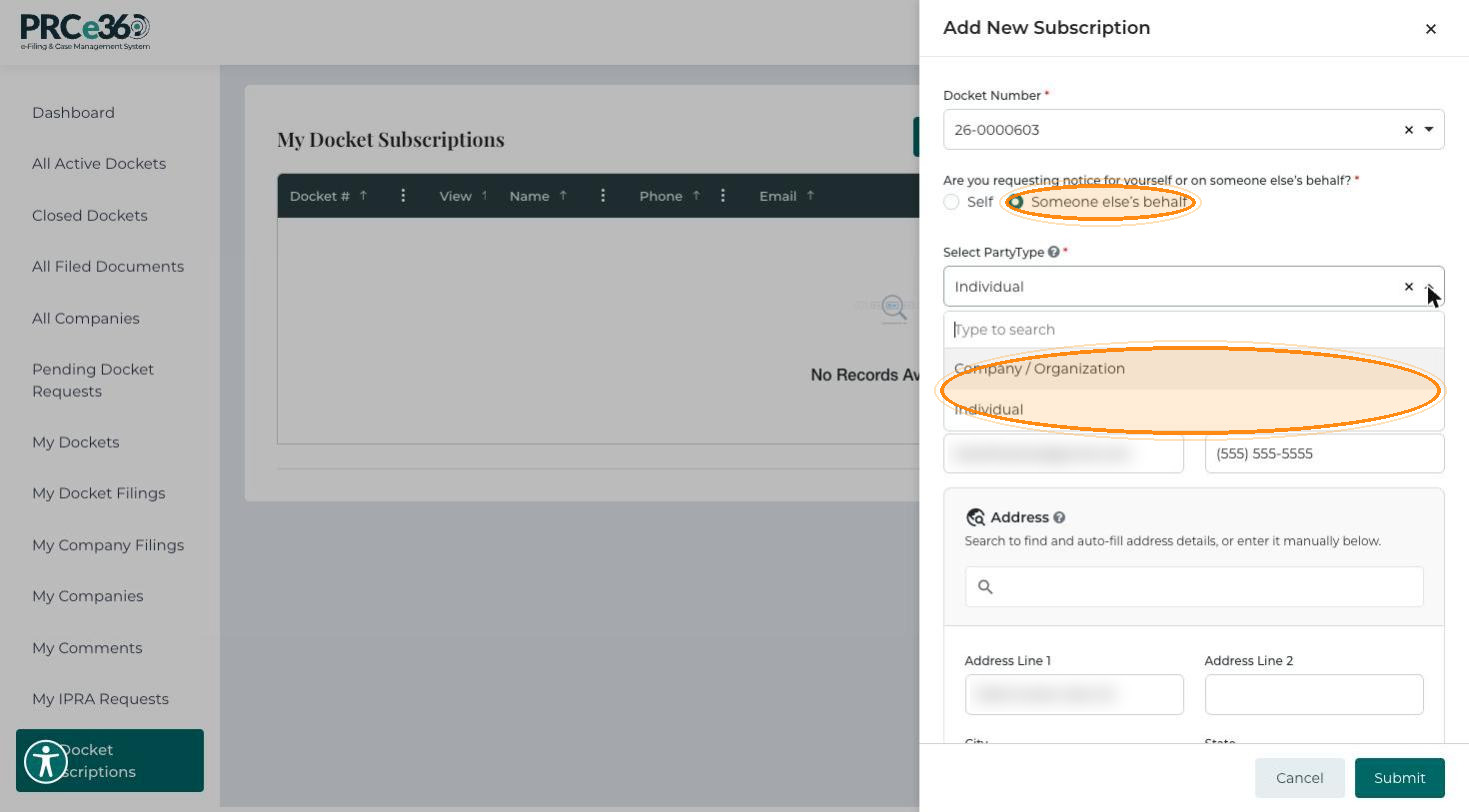
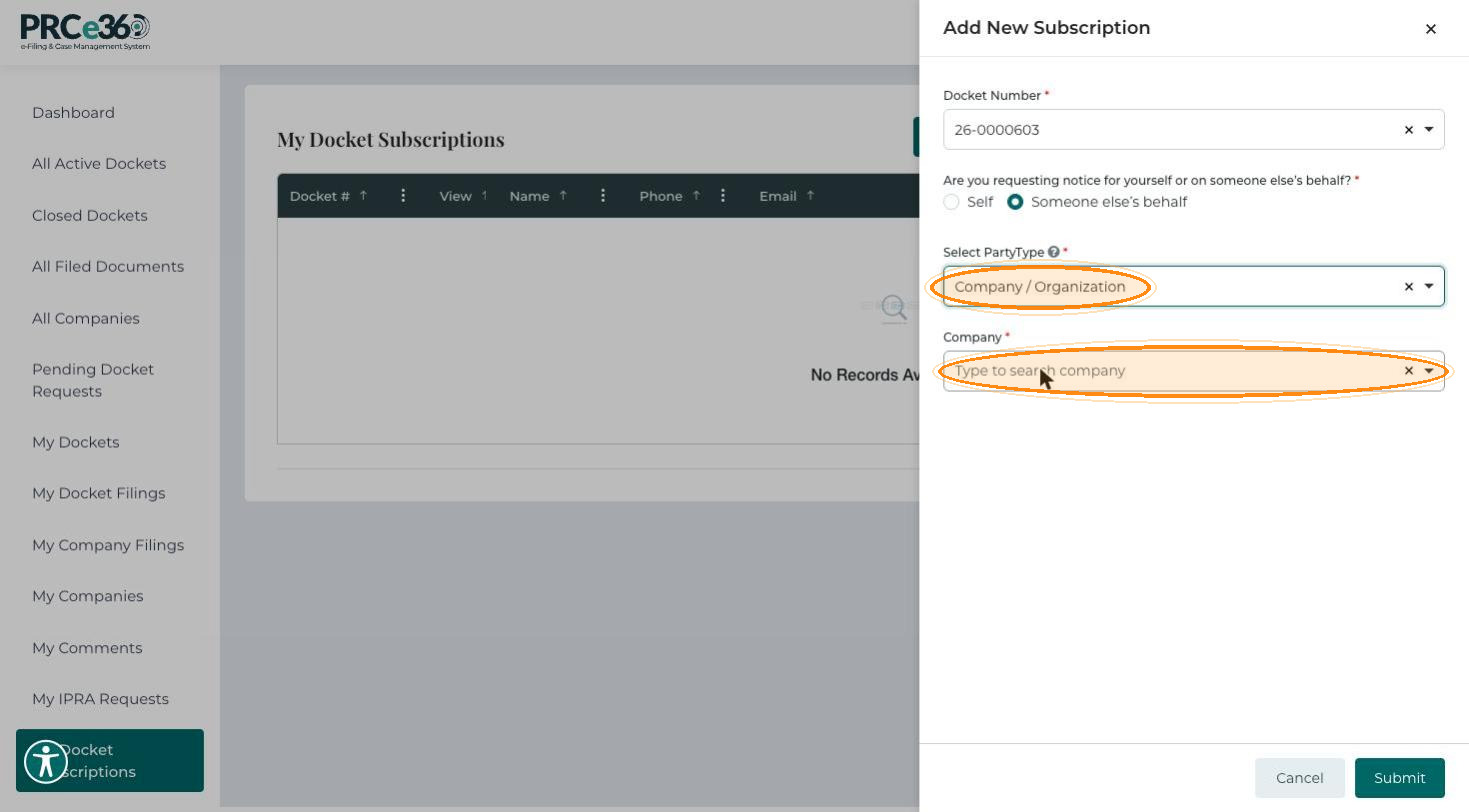
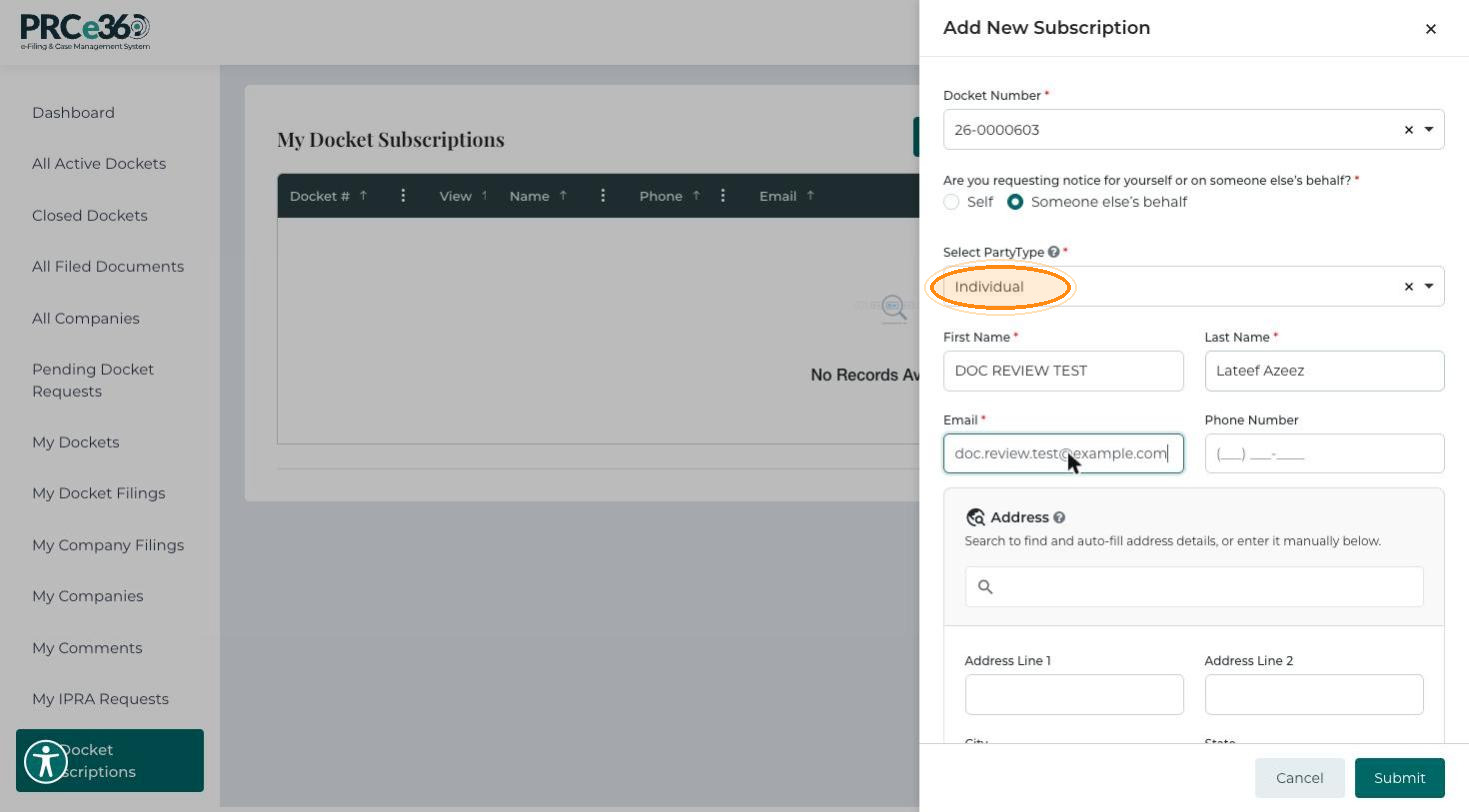
Someone else's behalf – choose Select PartyType*. For Company / Organization, search for and select the Company*. For Individual, enter the person's First Name*, Last Name*, Email* and, optionally, phone number and address.
-
-
Click Submit, or Cancel to close the panel without saving.
The new subscription appears in the list.
Edit a Subscription
-
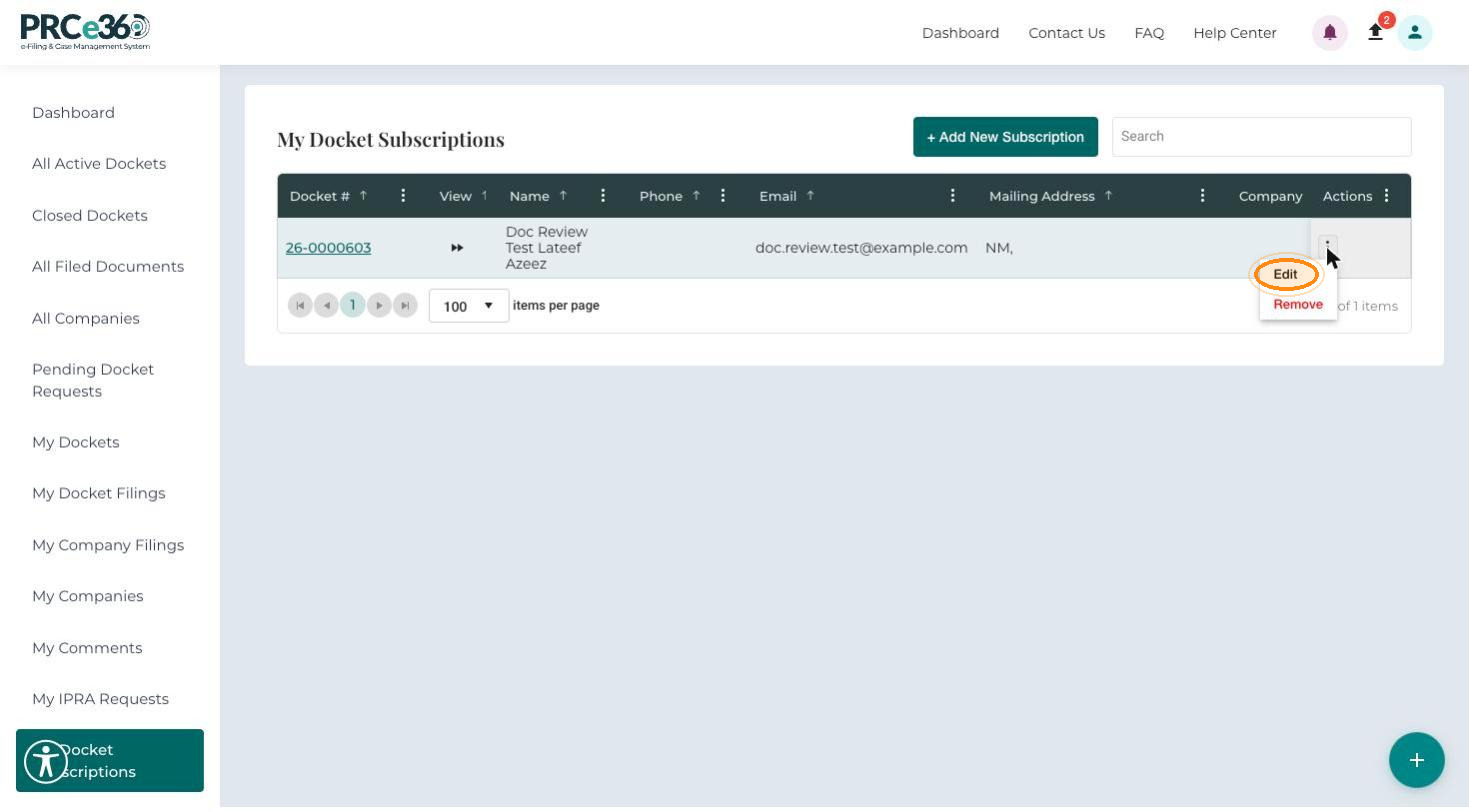
In the Actions column, click the three-dot menu and select Edit.
-
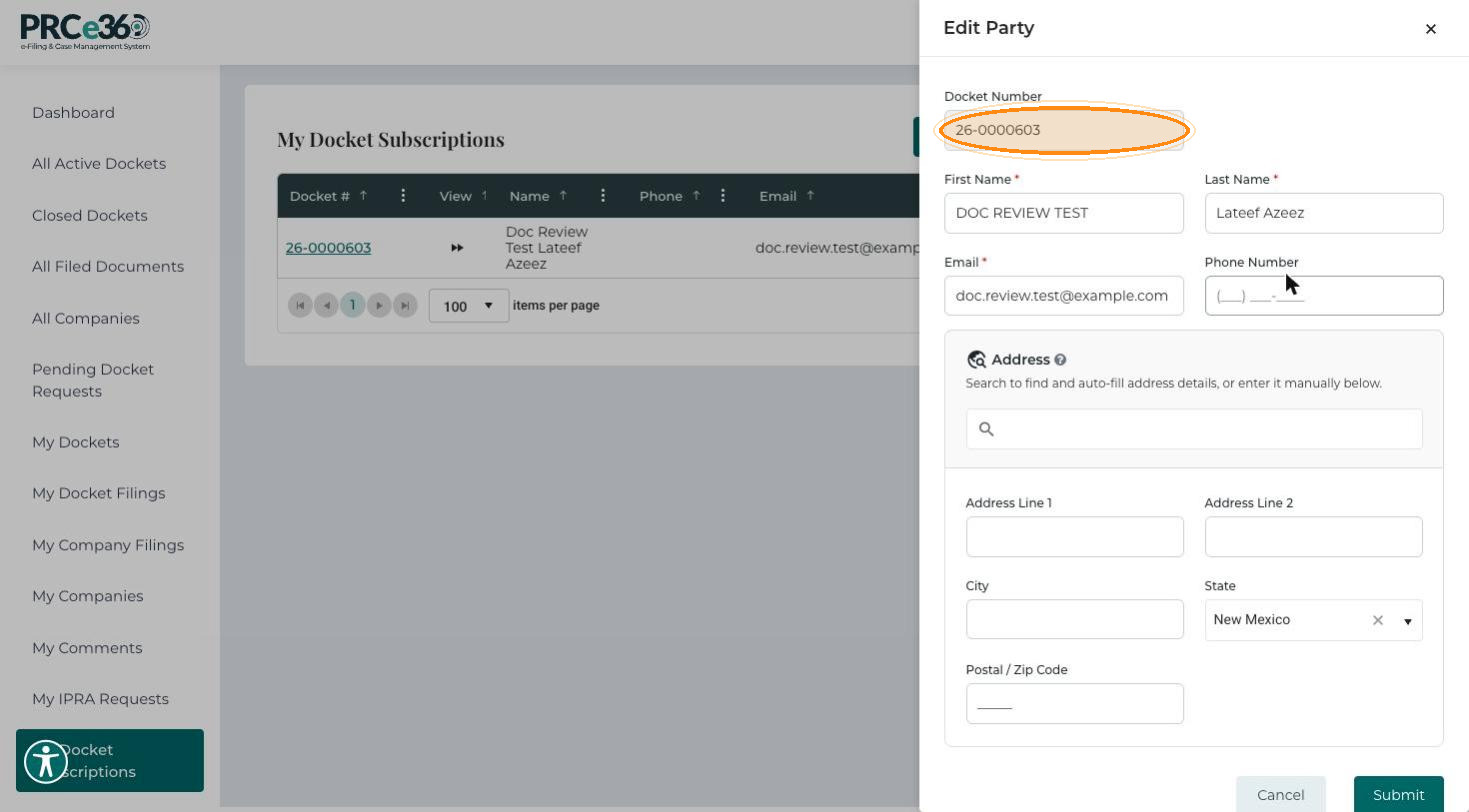
In the Edit Party panel, update the fields as needed: First Name, Last Name, Email, Phone Number and the address (Address Line 1, City, State, Postal / Zip Code). The Docket Number cannot be changed.
-
Click Submit to save the changes, or Cancel to discard them.
Remove a Subscription
-
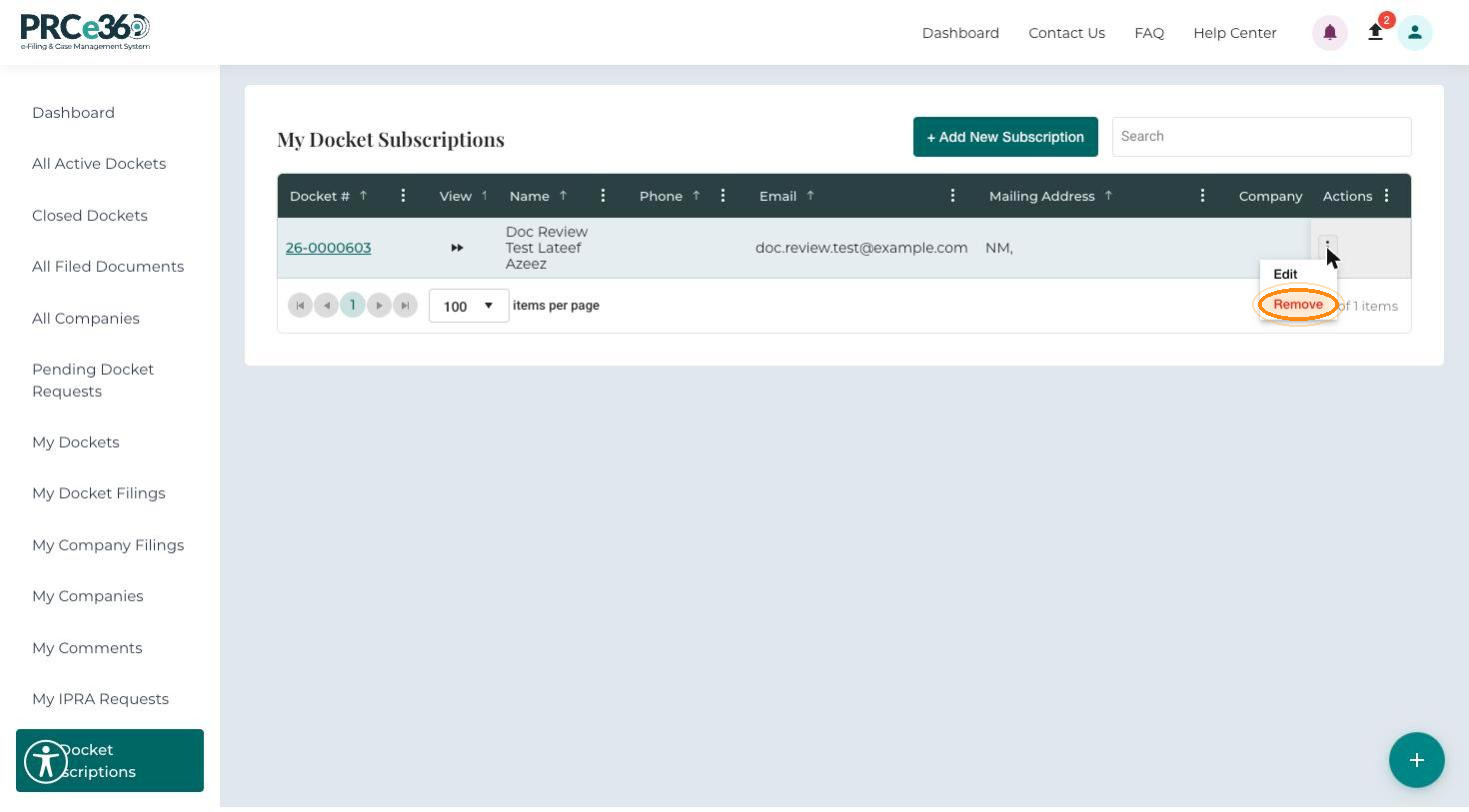
In the Actions column, click the three-dot menu and select Remove.
-
The Remove Subscription dialog asks "Are you sure you want to delete this notification?" Click Yes.
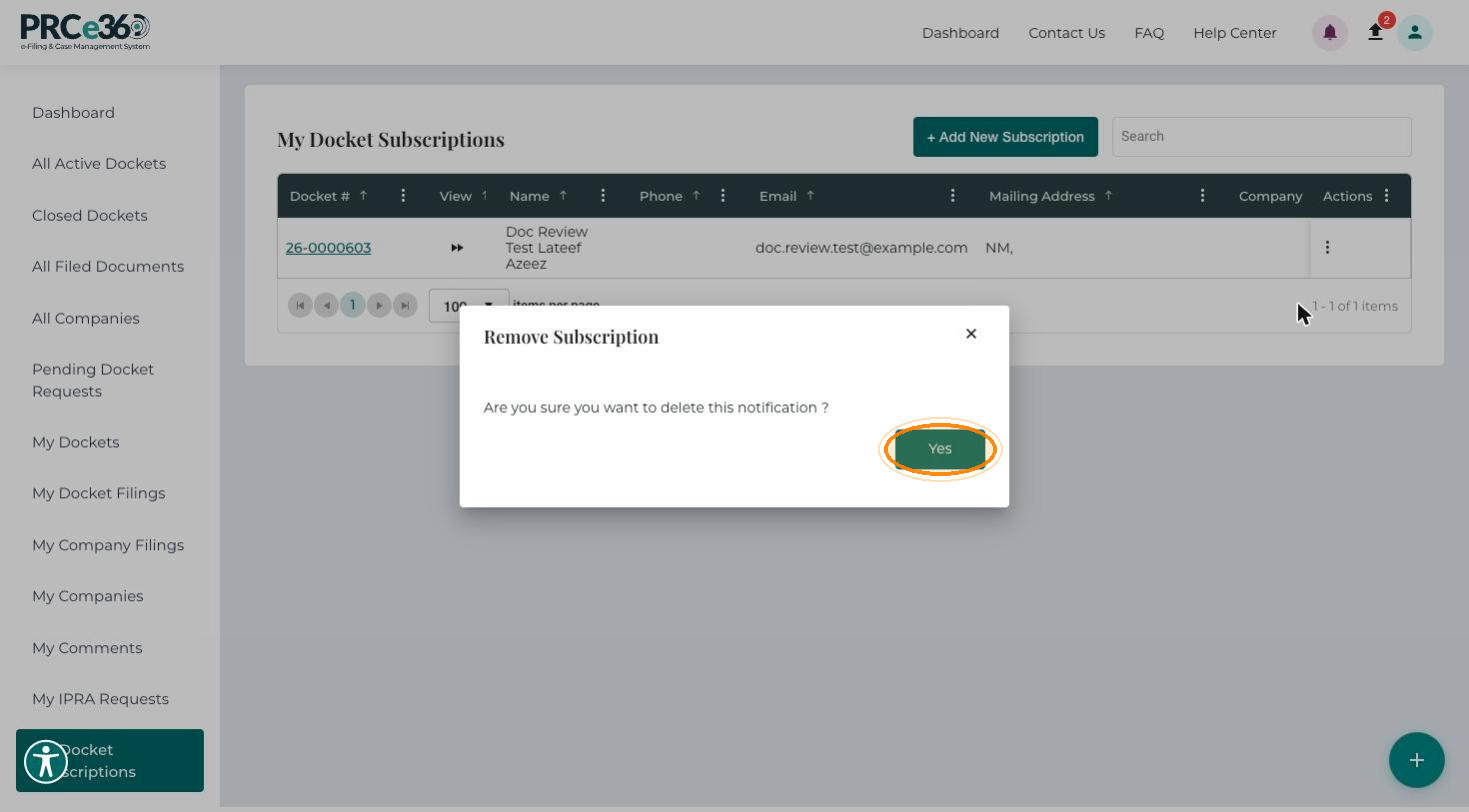
The message "Subscription is Removed." appears. If no subscriptions remain, the list shows "No Records Available."